A few days ago, I encountered what I believe to be a reddish-orange Caddis, tapping across the water on one of my favorite rivers, either laying eggs or just tempting the Cutts, below. A few of them found out that the young and impetuous trout can propel themselves quite a distance out of the water, for a tasty treat!
I found that I had some flies in my box that came close, but nothing I would consider “spot-on.” Operating under the assumption…dream?…hope?…that I will be given the chance to experience this, again, some day, I thought it best to tie a few flies that might approximate the appearance of them. The only trouble was; I never got one in-hand or close enough to really see them in detail. Looking on the web, I found several references to Caddis eggs being something in a range of greens, so I dug around in my kit and found some things that I hope come close:
- Rusty red 8/0 thread
- Olive green Antron yarn
- X-Small Copper Wire
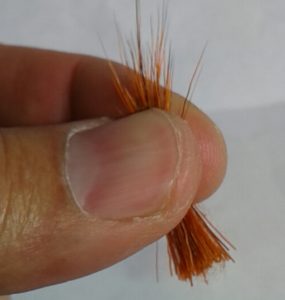
- Select Cow Elk hair – Orange
- Natural bend hook, 2xLong or 3xLong, such as Dai-Riki #270
- Burnt Orange grizzly hackle – ideally one size smaller than the hook size.
- Dry fly dubbing – Amber, today.
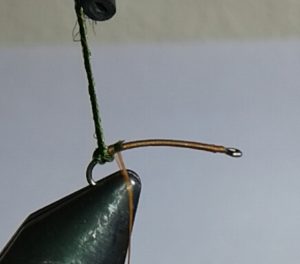
The hook I used has a great bend in it, that strikes me (I know…I don’t even swim like a fish, I just hope I have managed to narrow down my brain enough to think like one, for just a moment!) as similar to the curl of an insect attempting to push through the surface film to release eggs into the water, below.

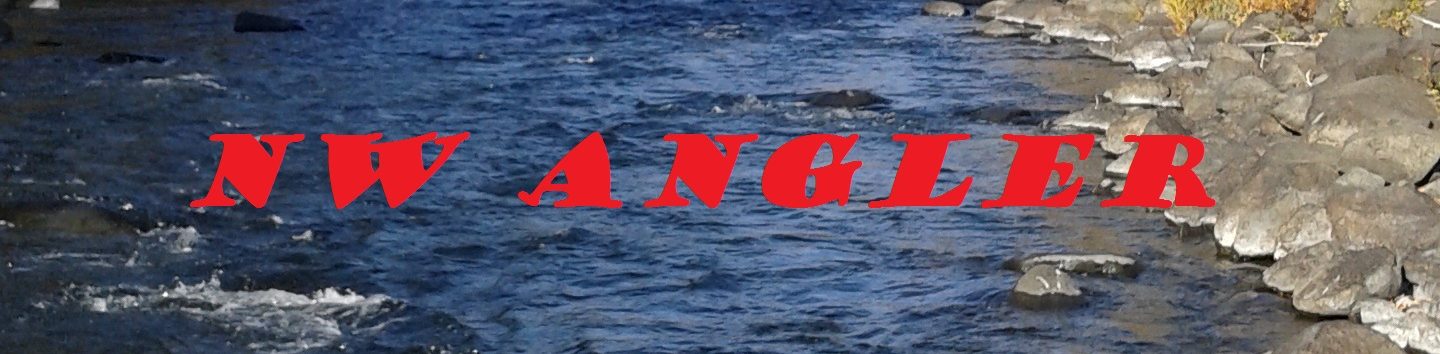
I started, as I almost always do, by wrapping on the thread just behind the eye, and working backwards. I still feel that laying down a tight bed of thread gives everything after that a solid anchor point.
Wrap backwards to a few wraps before the point in the bed where the downward angle becomes the most steep.
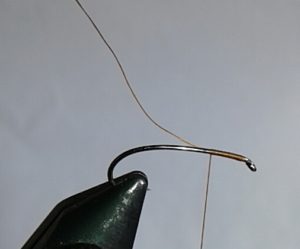
At this point, cut off a shortish piece of the yarn, then tie it in at the end of the thread you have already wrapped. I usually take off a bit too much yarn, wire, or other item that I will need to tie in, as my fingers can be a bit thick and require an additional bit at the end, for grip.

Grasp the other end of the yarn with hackle pliers, and twisted the yarn until it achieves a rope-like twist to it.
Carefully wrap this around the hook, right at the end of the foundational thread wrappings. I went twice around, and overlapped, as it just seemed more … Eggy … to me.
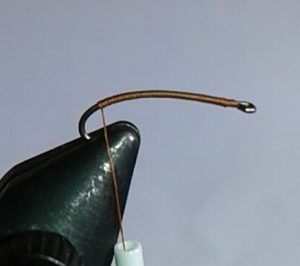
With the yarn held taught and upright, make three tight wraps with the thread, to pin the yarn down. The end of the thread should then be angled forward, along the length of the hook.

Tie a 3-4″ piece of the copper wire in, at these wraps, then start wrapping forward. Keep the yarn along the hook, until about the halfway point. If you trim it off earlier, the body of the fly ends up looking a bit lumpy, whereas trimming at halfway will be more easily concealed by the later dubbing work to be done.
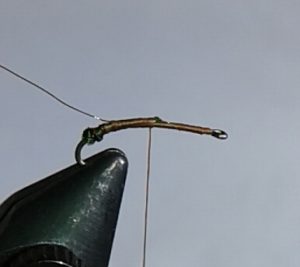
Now, wrap forward until you are about 1/3 of the way back from the eye, and tie in the trimmed tip of the hackle feather. Work your way back to where the wire diverges from the fly body.
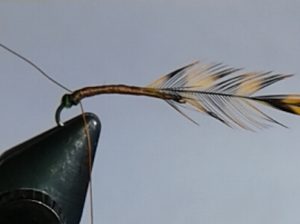
Once there, wax the thread (if you need it) and begin to apply the dubbing. Go thinner in the first section, then thicken up as you come closer to the hackles. Don’t worry about a bit of deviation, as you will be wrapping both hackles and wire over the dubbing, which tends to even out the soft dubbing fibers.
With the dubbing in place, grasp the end of the hackle feather, and make 3 or 4 wraps to the back. If I were using a 2xLong hook, I would probably make due with 3 turns. As this is a 3xLong, I went with four.
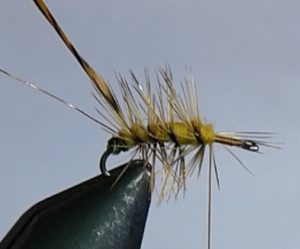
Without releasing tension on the hackle feather, begin wrapping the thread forward, counter to the hackles. This should pin down the hackles, as you go.
When you get to the front edge of the dubbing, make three tight wraps with the thread, then trim off the end of the wire, the tag of the hackle feather, and any stray hackles that appear to be protruding towards the front. I also usually put a small drop of head cement on the point at the back where the wire first pins down the now trimmed hackle feather.
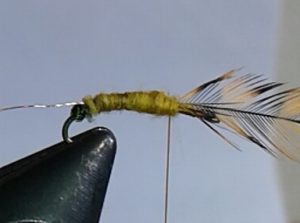
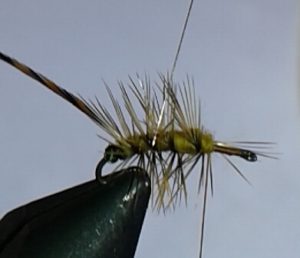
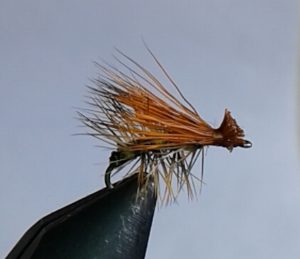
The body of the fly is now done. Time for the wings!
Pinch and cut a group of the Elk Hair that is roughly the same diameter as the hook gape. In fact, I ended up thinning out the bunch in this picture, after pulling out the fluff and under-hairs from the base ends, as I found I had a bit too much for the #16 I was tying.
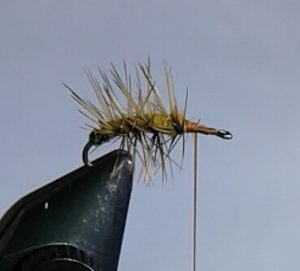
Level it off in a stacker, then line it up so that the thread wraps will pin the pointer ends, facing backwards, with their tips roughly above the back end of the dubbing. When you tie it in, use at least three solid pinch wraps, with strong upward pulls after the second wrap. I have trouble with hairs trying to roll to the far side, so I tend to start with the pinch wraps roughly 15-degrees towards me. After the third (or fourth) wrap, pull back one third of the base ends, and tightly wrap between them and the other 2/3. Once this is done move another 1/3 back, and repeat the tight wrap. After that has been accomplished, pull all the base ends back, and wrap a very tight ramp of thread against the front edge of all of them, keeping the hook eye clean and clear.
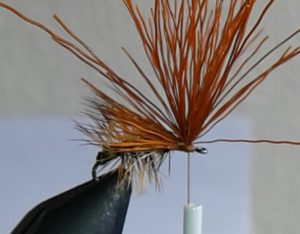
Now, grasp all of the base ends, pinch them together, pull them upright, and trim them all at once. The cut should be a wedge towards the front. Were I tying on a down-eye hook, I would follow the angle of that eye, and make the wedge an extension of it.
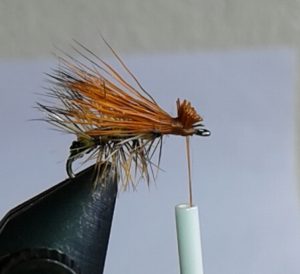
Now…whip finish, trim the thread close, a drop of head cement, let it dry, and hope you encounter the same Caddis activity, again!
Tight lines!