There are some flies that I really enjoy tying, as you may have noticed. Stimulators, Adams, Adams Parachute, and Elk Hair Caddis all fit that label. The basics, really, to get me by on my usual waters…most of the time.
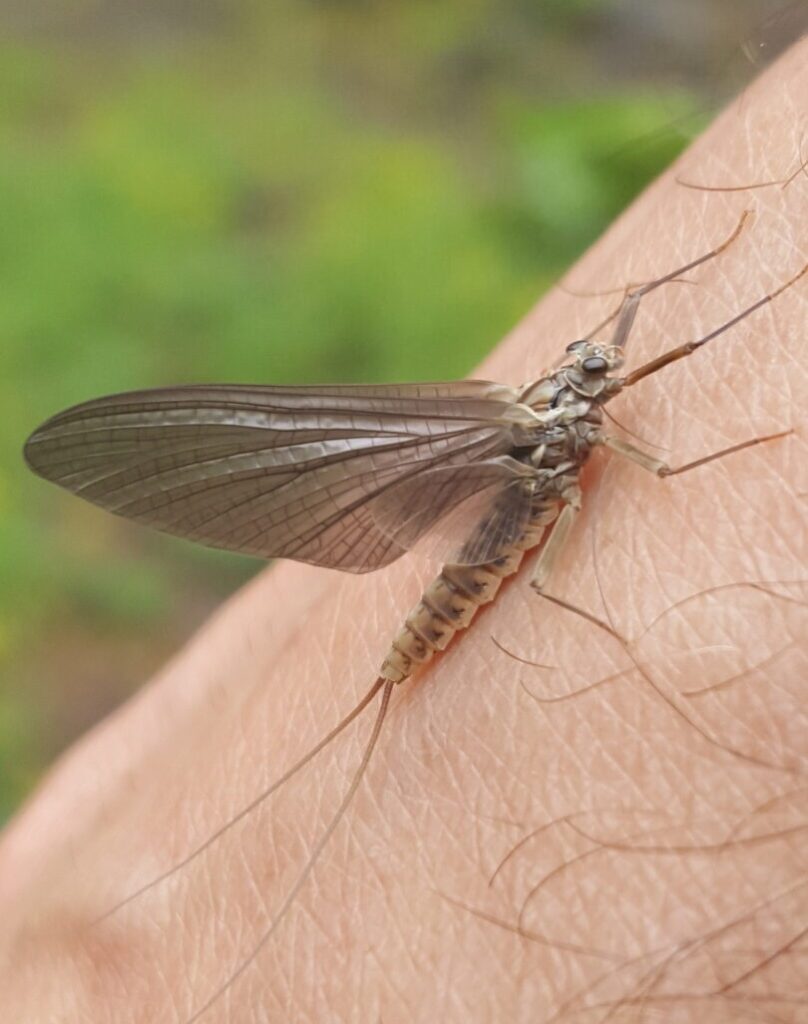
On one day, recently, I had a beautiful mayfly dun (Blue Wing Olive…I think…?) fly close you me, choose not to avoid my flailing/grasping paw, then do me the favor of staying on my hand long enough for a reasonably good pic.
I know I’ve read that some of those flies that I more regularly tie and carry can “make do,” when it comes to imitating these…
…but…
As I was up for a little change, this weekend, it was time to tie something a bit more specific. I didn’t have good, durable tail fiber options (I will likely get them on my next stop at the fly shop), so I couldn’t do a full mayfly.
What I could do, at least kind of do, was a batch of Sparkle Duns.
- #12 barbless dry fly hooks
- Veevus 12/0 Dun colored thread (I over-wrap as a habit!)
- Olive/PMD schuck antron yarn (out of z-lon, so this had to do)
- Short/Fine deer hair in a gray tone. Mine was a bit dark, but we’ll see how they look.
- Light olive dubbing. I went synthetic for this set.
Start with the hook clamped in, and initial thread base layer initiated.
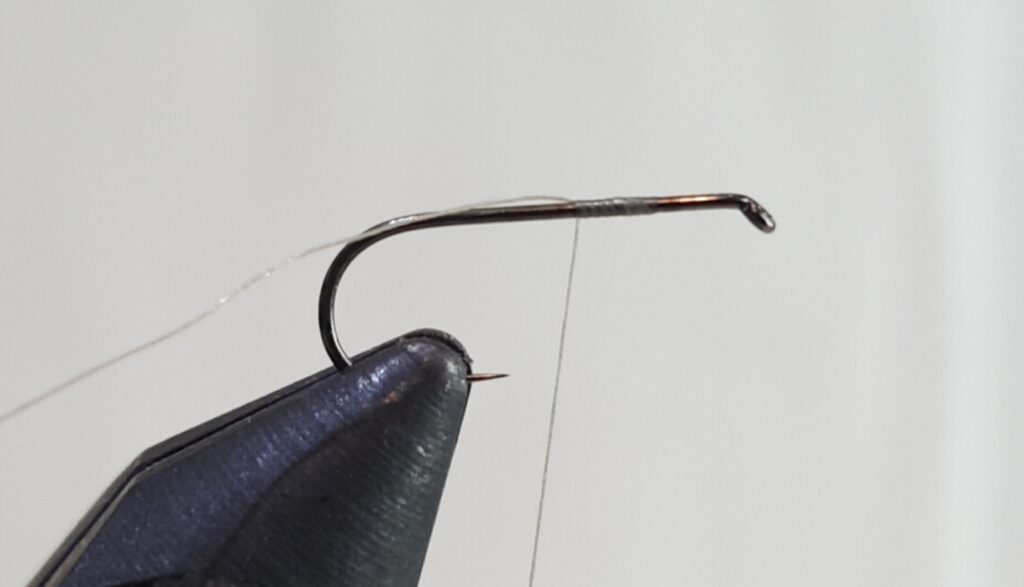
I, as mentioned in the materials list, tend to wrap a lot of perhaps unnecessary thread, so I take this step then wrap until I have a tight base layer from behind the eye to the top of the bend. I feel as if it helps lock the materials down more securely.
Snip off a medium to large bundle of hair, for the hook size, then clean, stack, and measure about a shank-length.
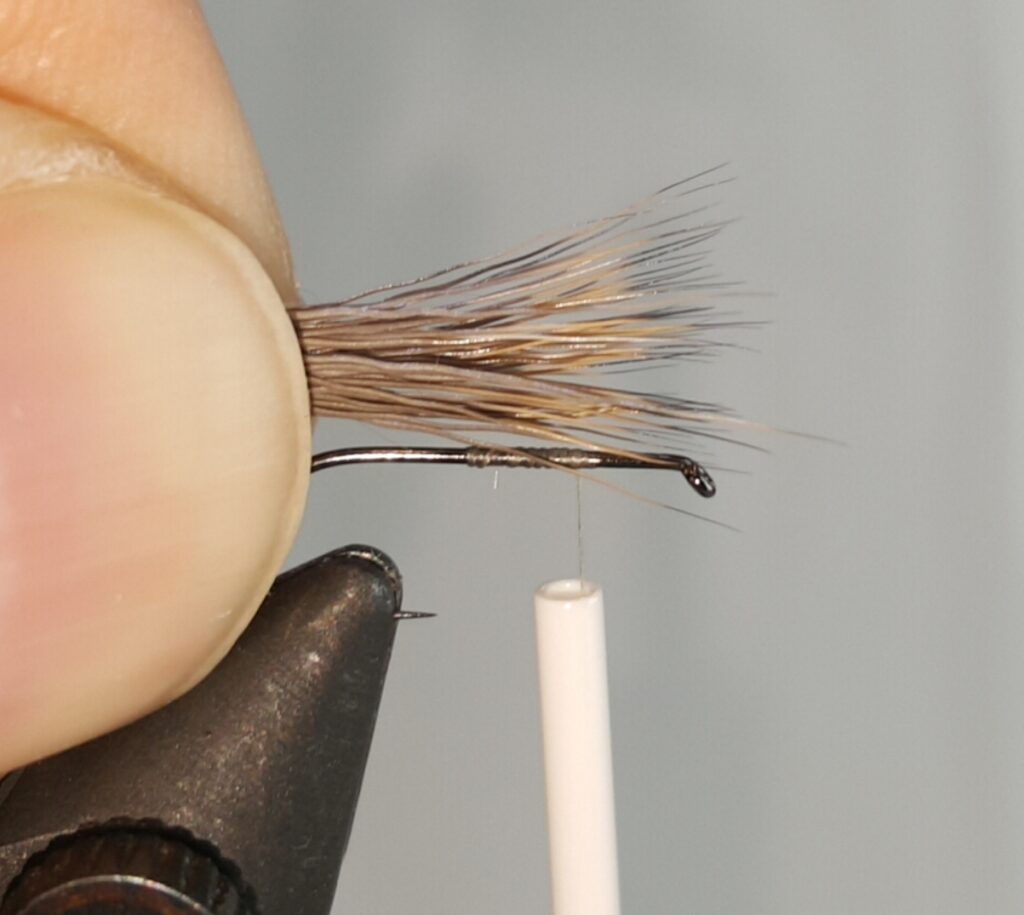
Shift it forward so your pinch point is at the dangling thread (1/3 back from eye), then tie it in.
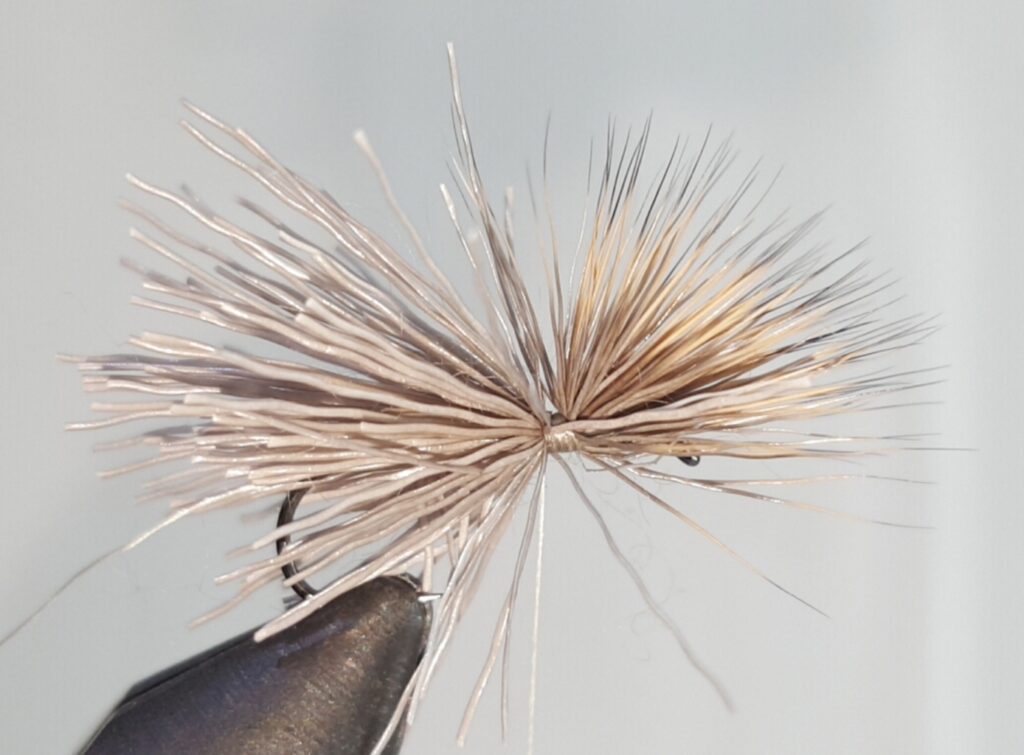
I started with two fairly light wraps, to gather it up a bit, then more tightly pinch to keep the hairs together and on the top, as I added some tight wraps to lock it in place.
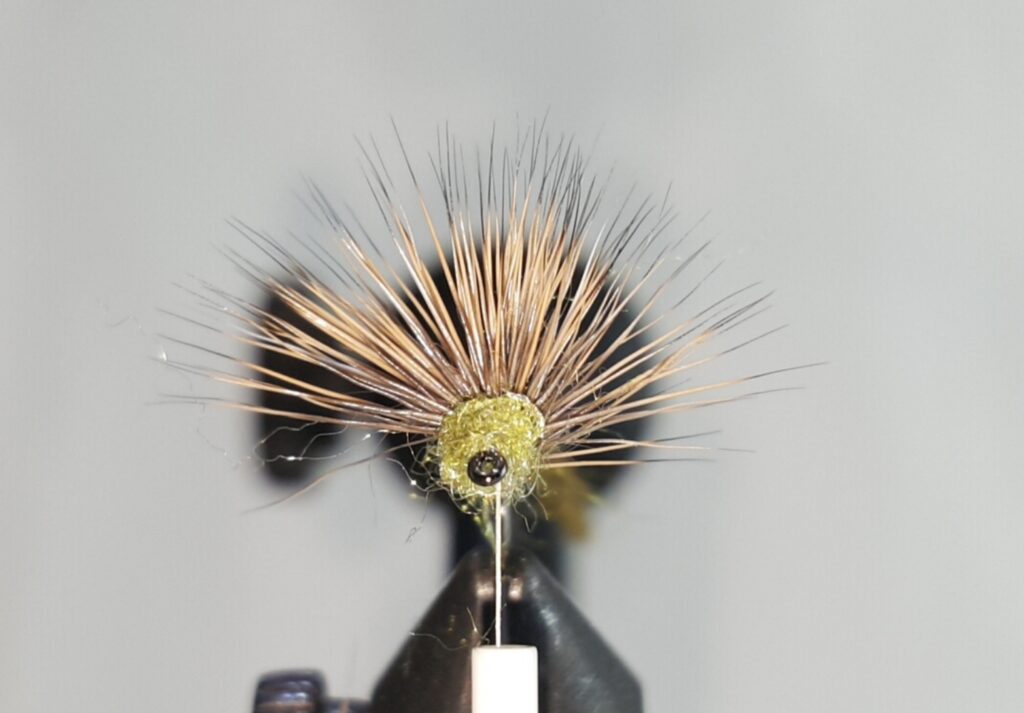
To be clear: you want the deer hair to flare considerably, but try to keep it in the upper half of a circle, around the shank. No need to worry about a few strays, as you will be adding some support and boundaries, soon enough.
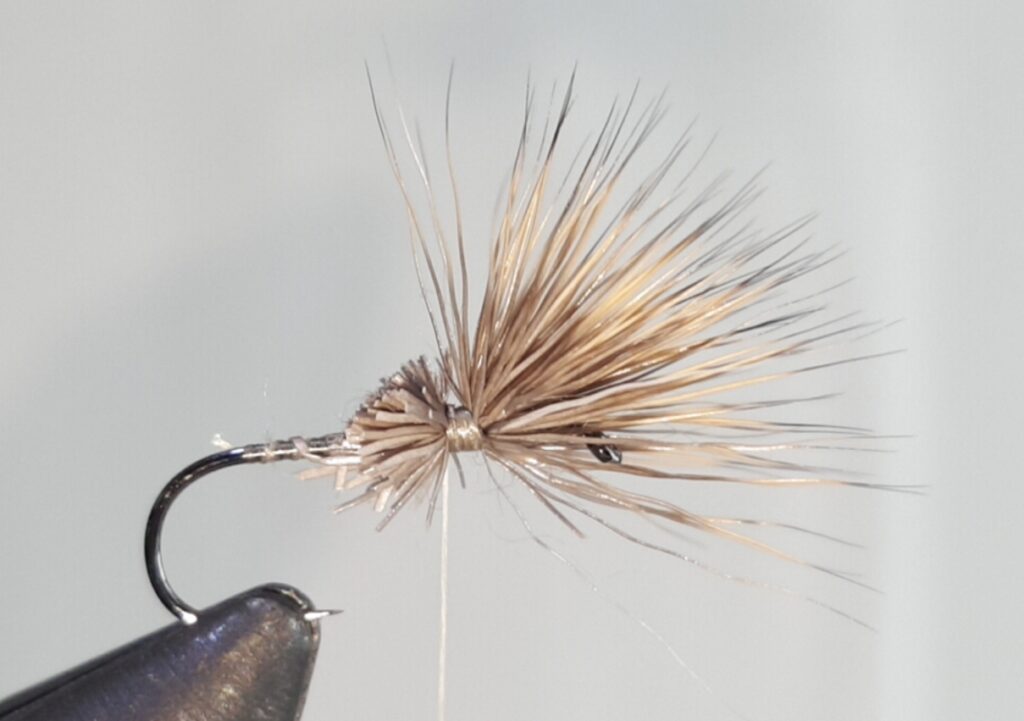
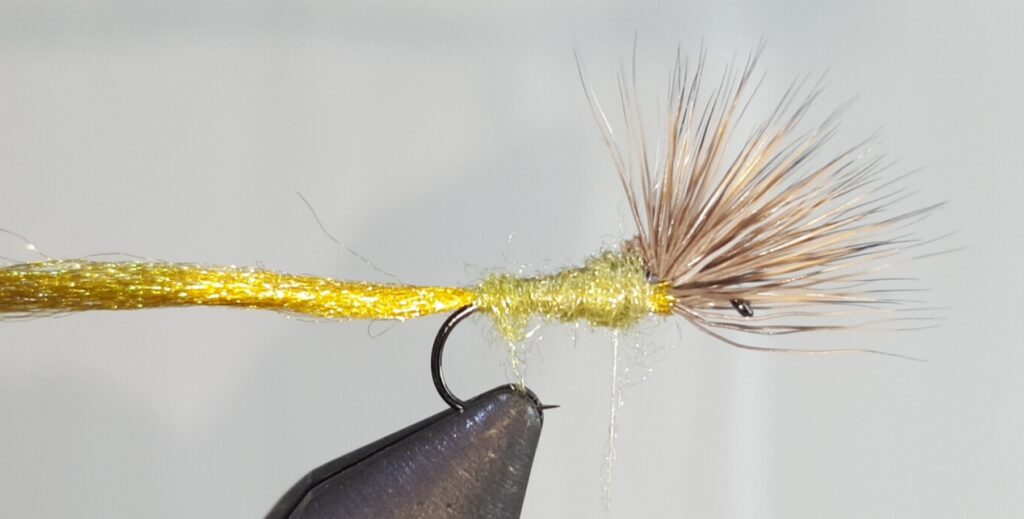
Trim the butt ends off with a bit of a taper, so it can help form a fat body, when wrapped down then dubbed. Before you wrap from there to the bend, snip off a piece of the yarn that can run to the top of the bend, then extend at least a full hook shank beyond.
Wrap the rest of the butt ends down, incorporating the yarn into those turns, as well. Run all the way back to the top of the bend, in this way.
From here, start dubbing forward in tight, touching turns that get a bit thicker as you go.
Keep your wraps tight and stacked up a bit, behind the collar6 of hair. You want to make a back-stop that will keep them from angling too far back, when they start to get pressed from the front side. Once that’s in place, start wrapping at an angle (lower part of each loop pulled towards the bend, upper part pushing back the hairs, evenly around their 180-degree base), until you have a nice dam in front of the hair, then finish out the rest as a nice “nose” on the fly.
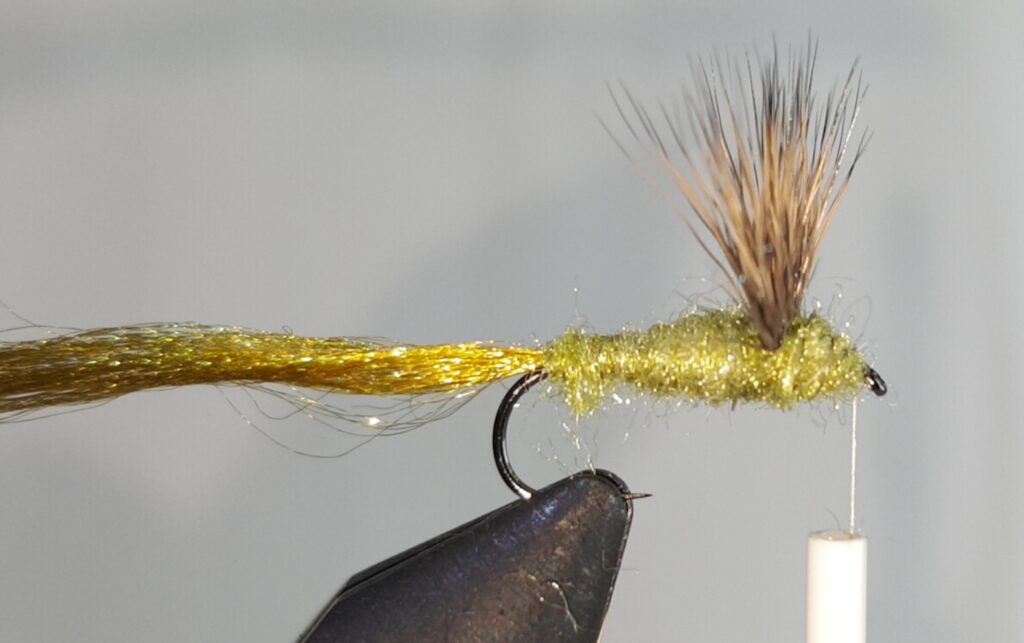
You may need to tweak and adjust the hair, as you go, but in the end it should lock in place fairly well. From the front, mine ended up perhaps a bit light on hair density, but I think I got the half circle fairly well.
Next time, more hair.
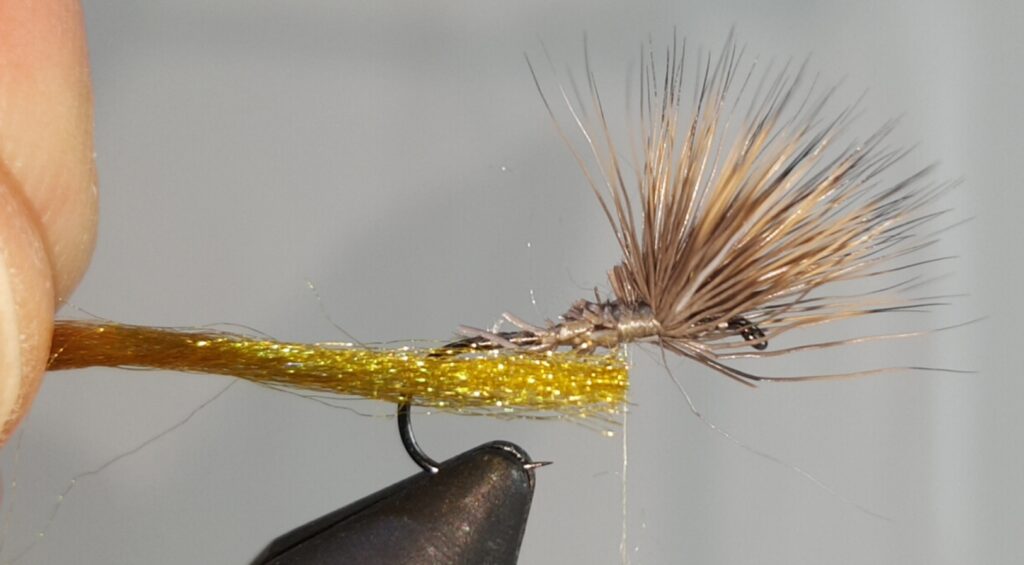
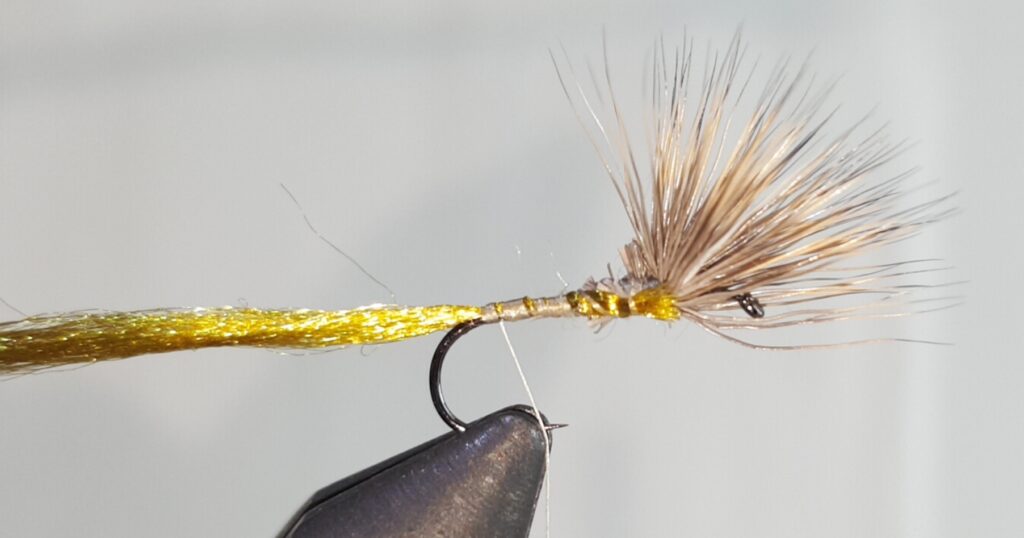
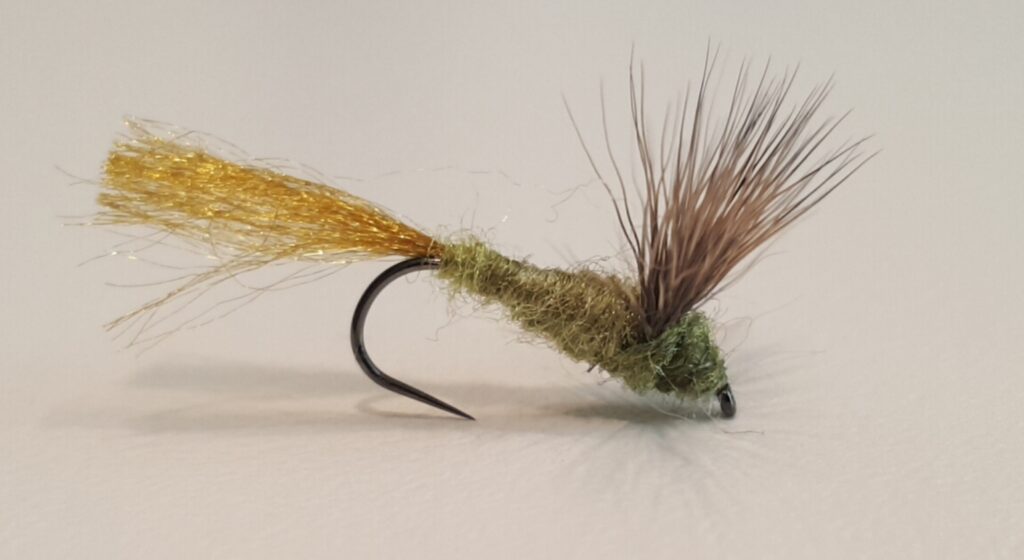
After this, whip finish, head cement, and snip the trailing yarn to roughly a shank-length exposed and trailing. Obviously, a few material upgrades are in order for future batches, but fun to tie, just the same.
I’m always open to improvement, so feel free to comment with suggestions!
Looking forward to seeing what the fish think, too. Until then,
Tight lines…