Father’s Day weekend. Two days relatively off from work, and weather that might be turning out very nicely. Sounds to me like a day to prep…and a day to fly fish!
Having lost a couple of flies in the first few weeks of this fishing season, I had to replace a pair of Burnt Orange Stimulators, to bring the back stock up to it’s ideal level (I love tying those, so really losing a couple is just an excuse. I have more than enough to lose them with much more regularity than I do, in a given year, and not “run low” for a long time).
Beyond that, and having had that opening day encounter with a beautiful mayfly, I wanted to be sure I tie a couple more, so I have some variation.
- #12 Dry Fly hooks (Hanak, H100BL, today), Already barbless.
- Superfine waterproof dubbing – in “Blue Dun”
- Veevus thread (I went 6/0, which is unusually large for a #12…because I just thought the color, F09/”Silver Doctor Blue”, would work well)
- Antron yarn in Steel Gray
- #10 Whiting 100 pack of Dun hackles
- Synthetic mayfly tails – Medium Dun
Okay…I did also pick up some natural fibers to try for the tails…but felt like giving these a chance, first. They seem to take more abuse than the naturals, without deforming.
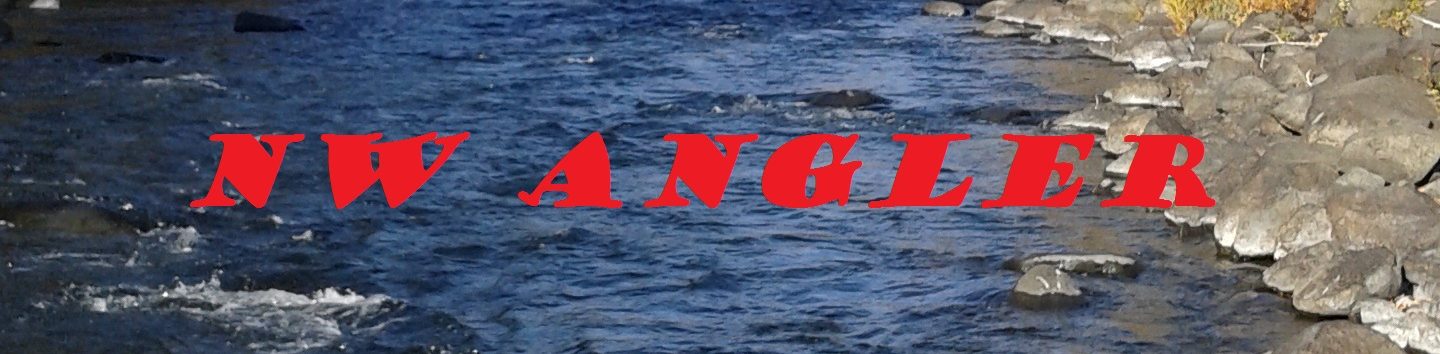
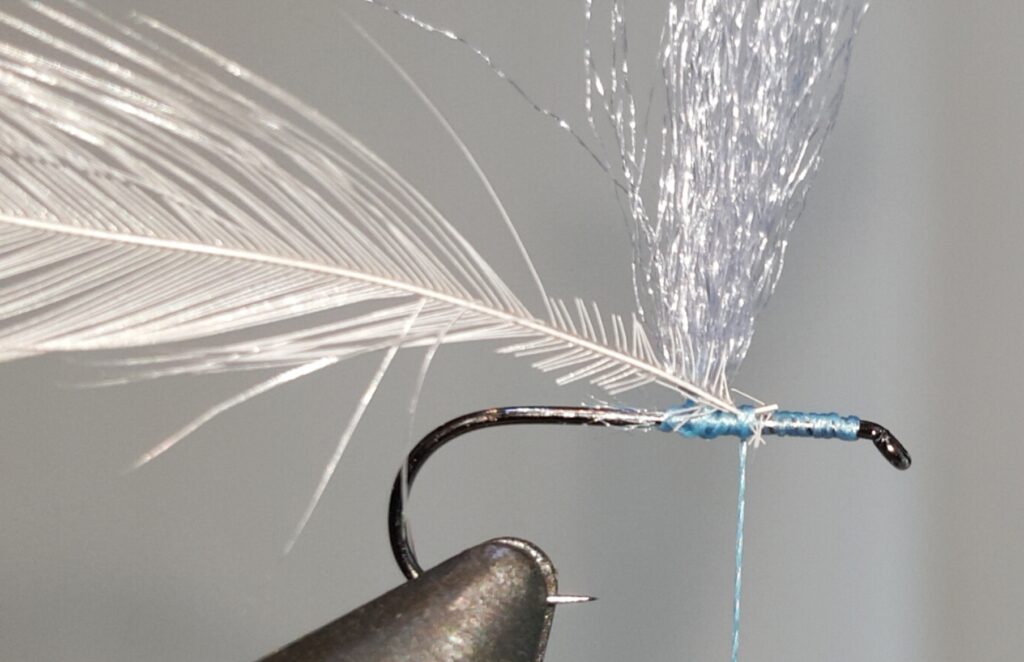
Anchor in the thread on the hook, starting just behind the eye. I wanted to make one long pass down the shank, given the thread thickness, so my goal was to add materials working front to back, without a base layer. Leave a long tag end, which you will cut off about 1/4 of the way back, as you wrap towards the bend, then set that tag end aside.
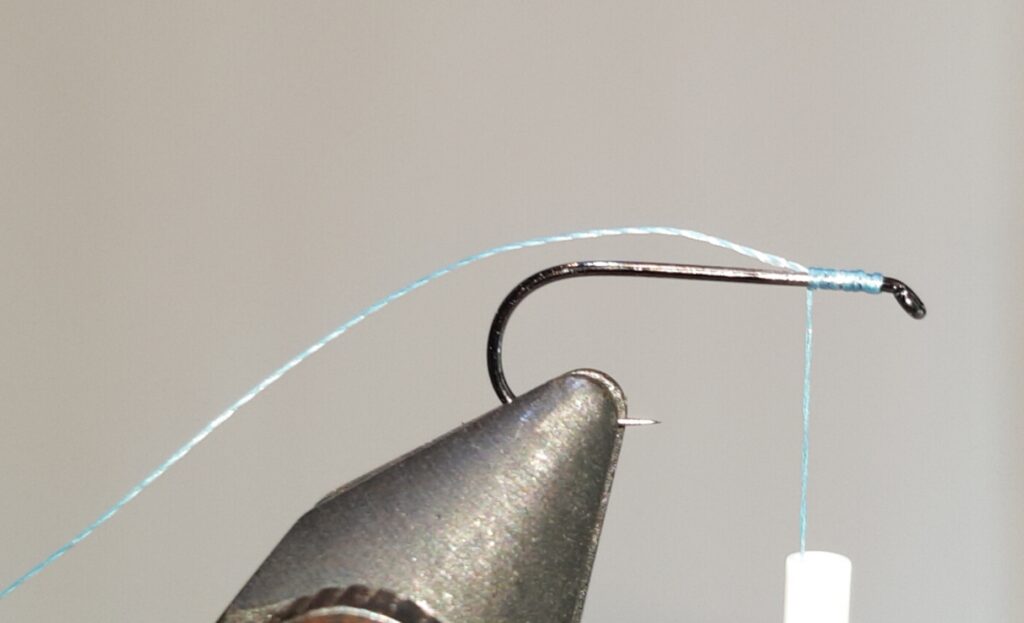
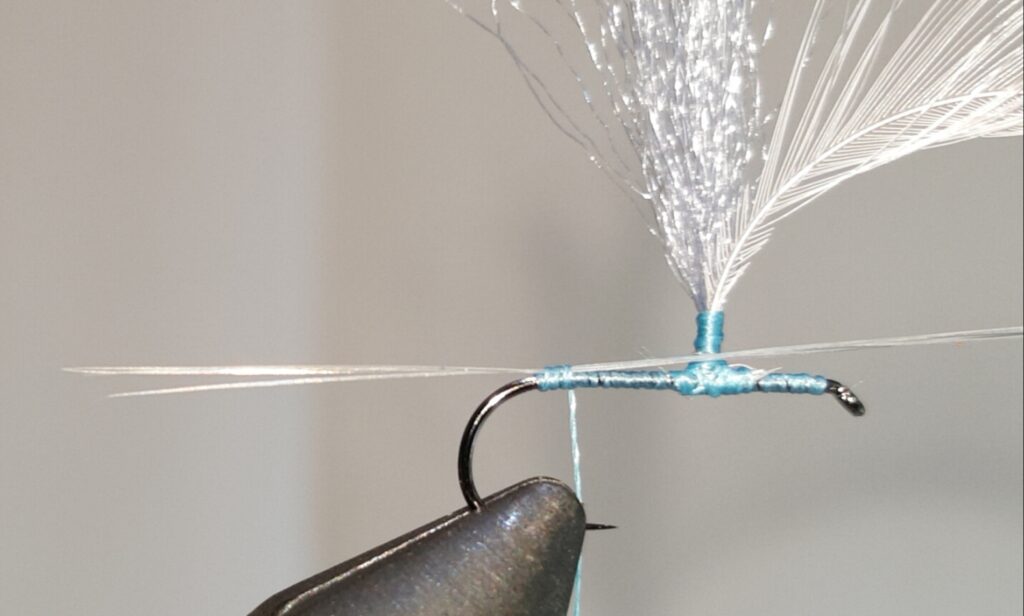
Roughly 2/5 of the way back, stop to tie in a section of the Antron Yarn. Cut a fairly long piece, fold it in half around the thread, then hold it upright as you tighten the thread in the wrap, anchoring it to the top of the hook shank.
A wrap in front of it, then one behind, then a few wraps around the base of the yarn, to force the two loose strands into a single “post.”
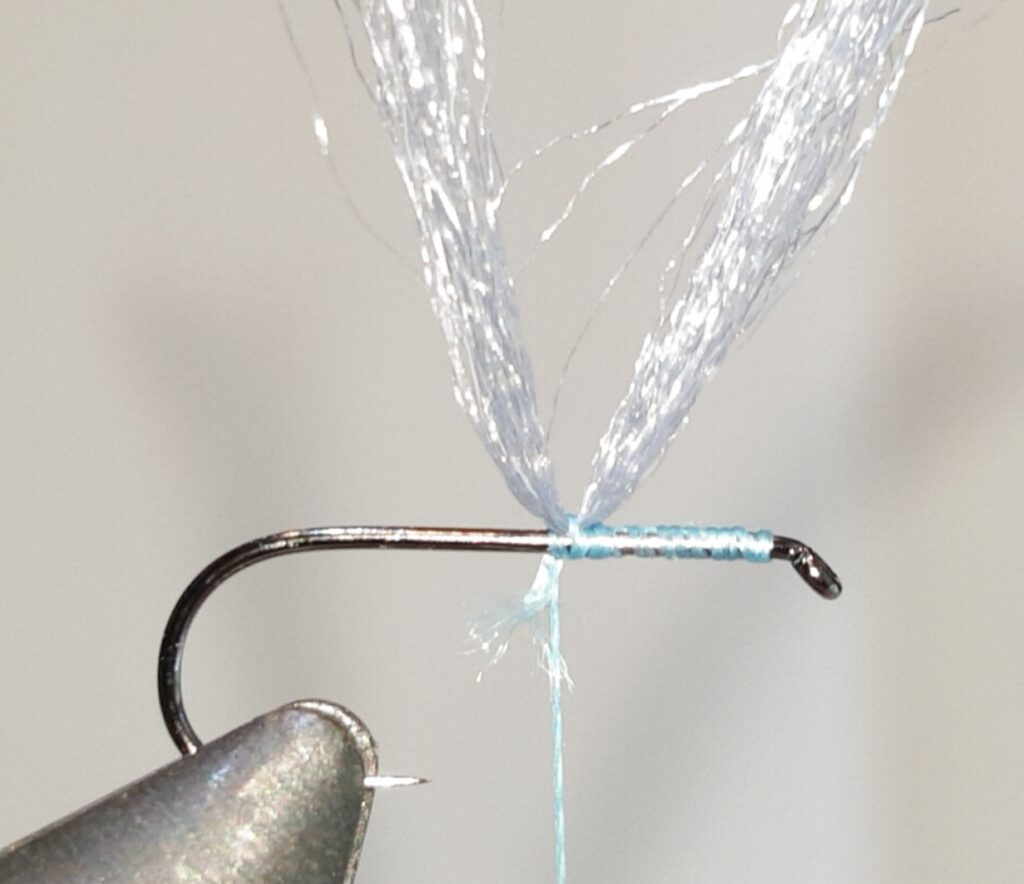
Next clean the end of the hackle to about twice the length of trimmed fibers you would normally cut, if you were just doing a wrapped hackle collar. Tie the tip of this onto the hook shank, the rest leaning towards the bend.
A few more wraps to pin the trimmed butt end in place, then bend it upward, to lay against the extended yarn, and give it several touching wraps, to form a more solid collar that climbs up the combined yarn/hackle feather. The feather should add just a bit of rigidity to the post, as you go. When you’re done, the yarn and feather should be protruding straight up from the top.
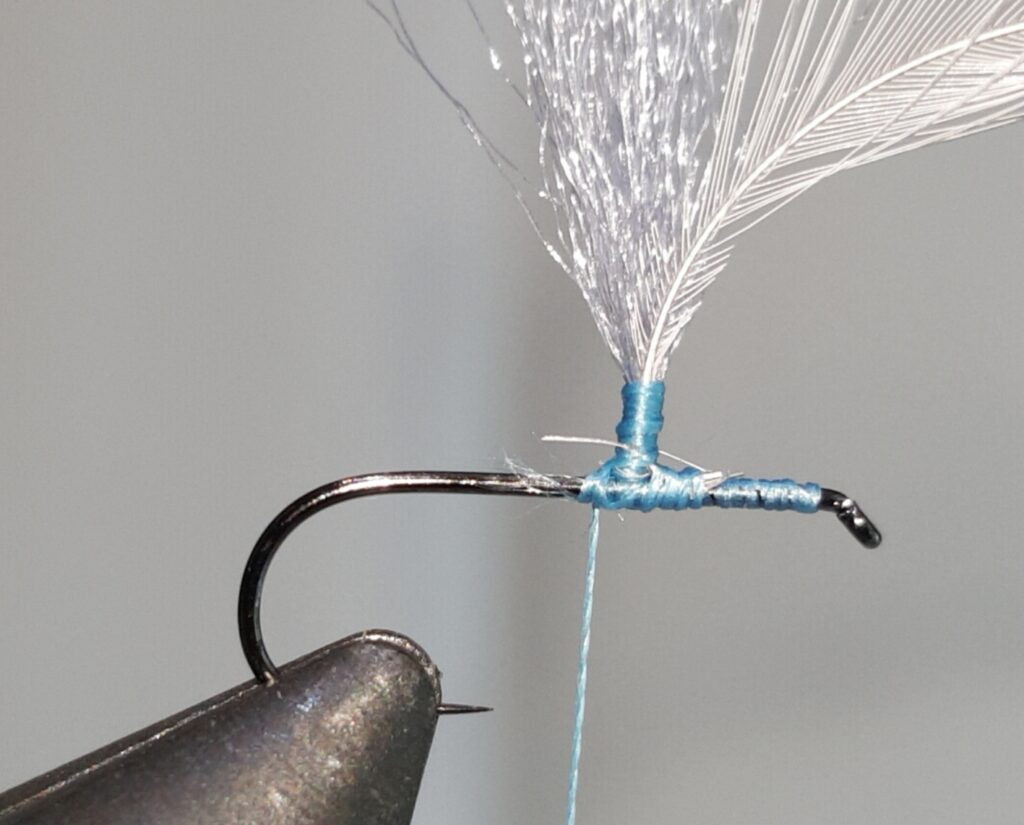
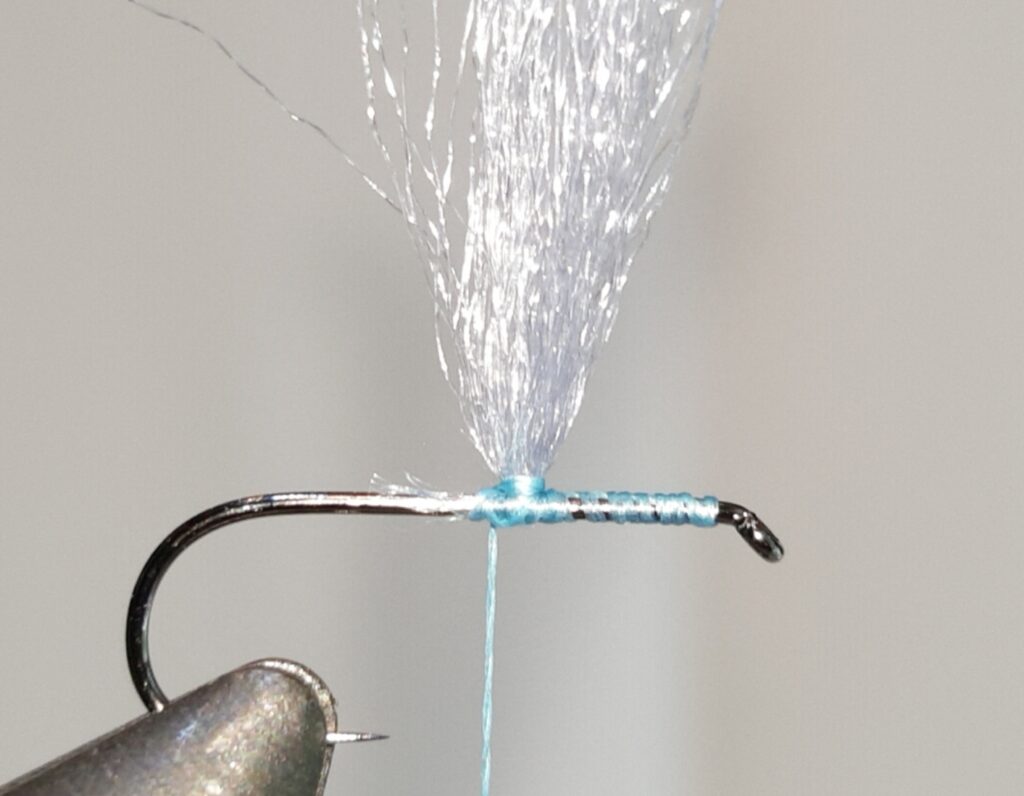
Wrap back down to the base of the post, give it a pair of “saddle wraps,” where instead of continuing to wrap in a uniform direction, you go over the top of the shank, around behind the base of the post, then back down on the side you just came up from, then reverse the procedure in the opposite direction. The end result is a pair of tight wraps pulling the base of the post simultaneously to both front and back (from the tyer’s view), keeping it from being able to rotate around freely around the shank.

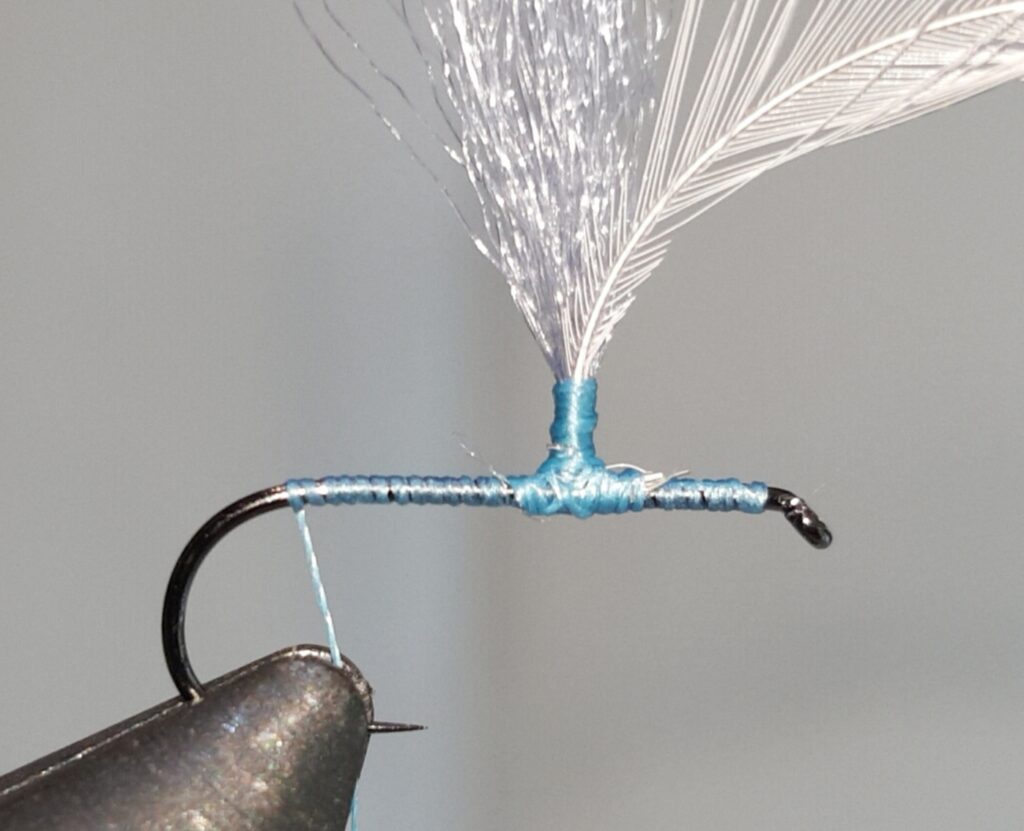
Continue wrapping to the top of the bend, giving a small bump of a couple of additional wraps, at the farthest back point.
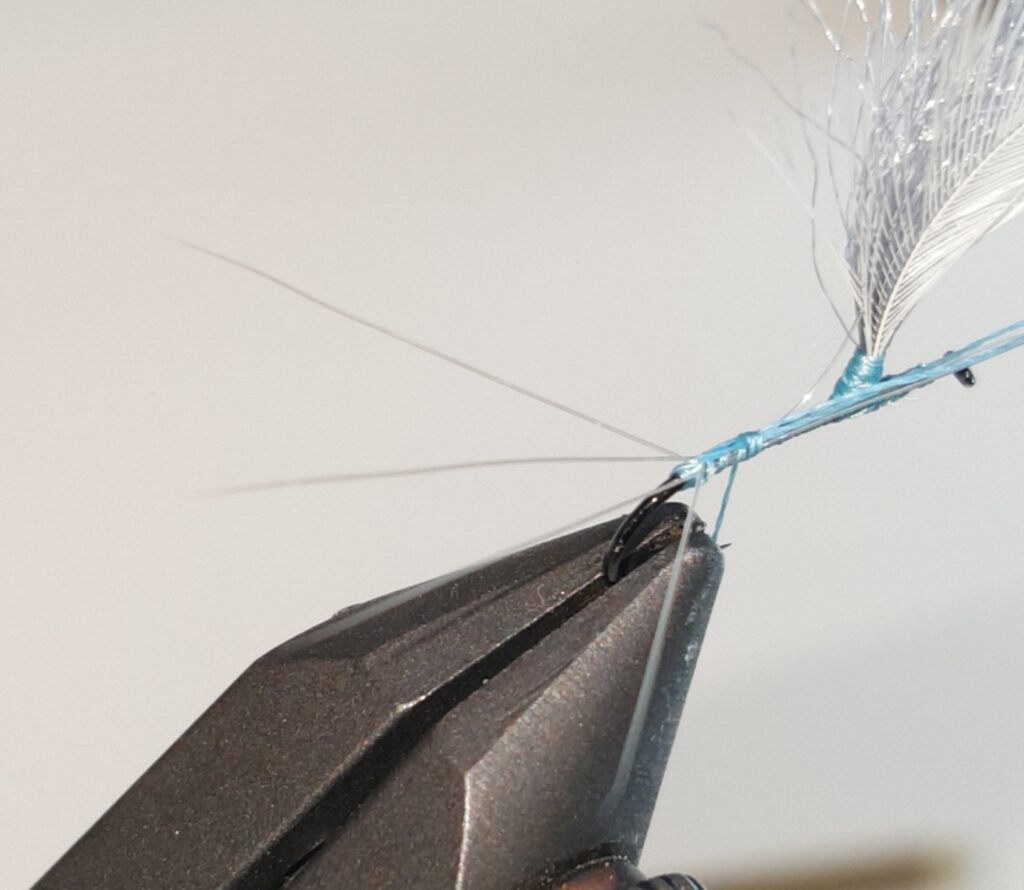
Take a set of 4 tail fibers from the package, and line up the pointed tips of them. On one I did this free-hand, and the other I used a small stacker. Whatever works for you.
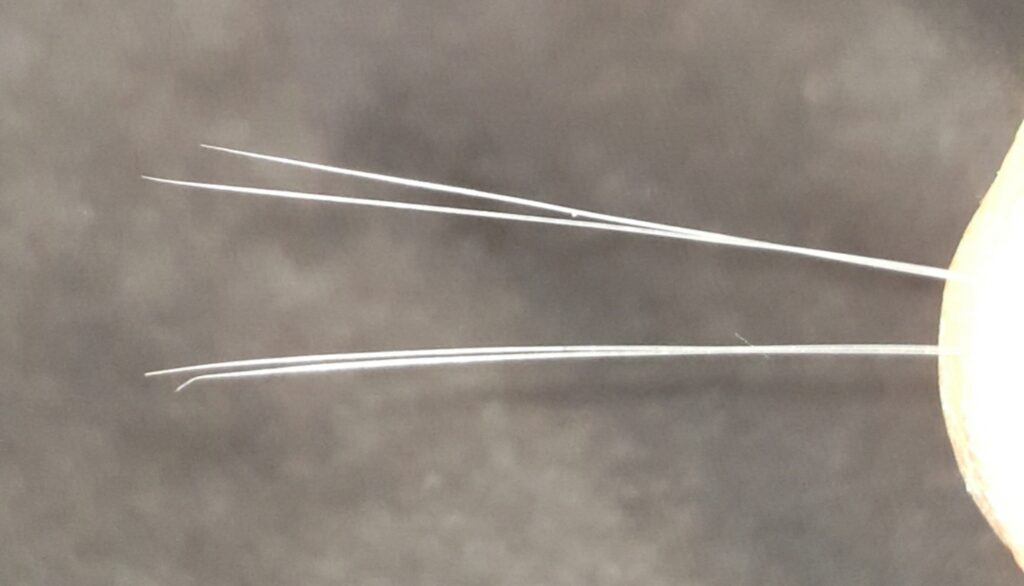
With the point toward the bend, line up the tails so there is a hook length of them beyond the thread bump, and tie them into the top of that spot.
Once anchored in, take the trimmed tag end that you set aside (you did, right?) and bring it around the bend of the hook, being careful not to pin or entangle any fibers or the dangling thread.
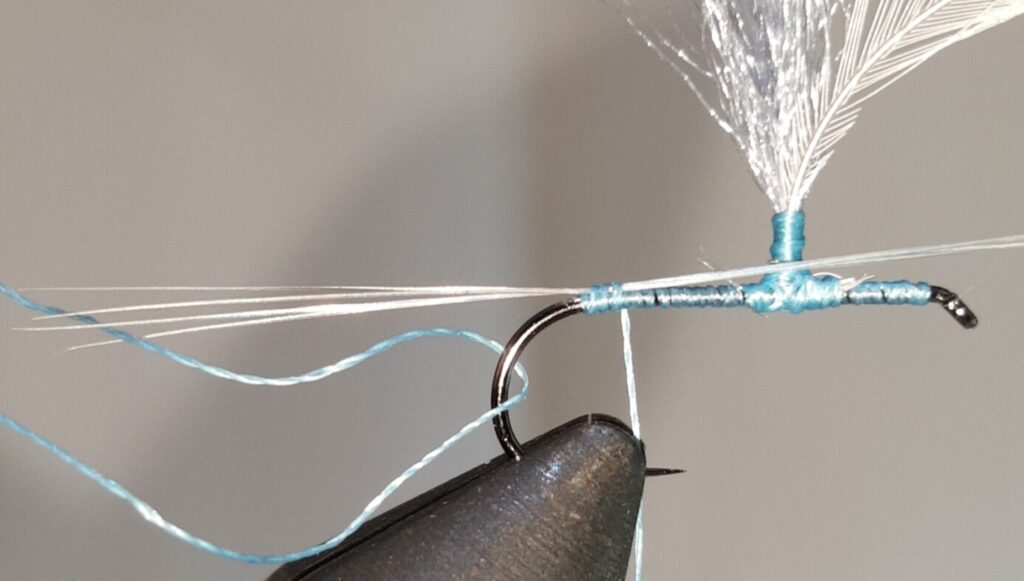
With your dubbing needle, looking down from above, separate the 4 tails into two pairs, and bring the tag thread loop up, between them.
When you pull this towards the hook eye with some tension, it should splay out the tails, nicely.
Gauging how much tension it takes on each fly, to get the tails well spread out, a few wraps of the main thread are then used to pin down the tag ends.
Trim the remaining ends of the tag loop and the tail fibers, once they are all locked down. I should add, some online tying videos suggest a drop of UV Epoxy on the anchor point where the tails connect, to retain position and durability. I just don’t use that (or even have any), so I will see how well this technique locks them in place, for now.
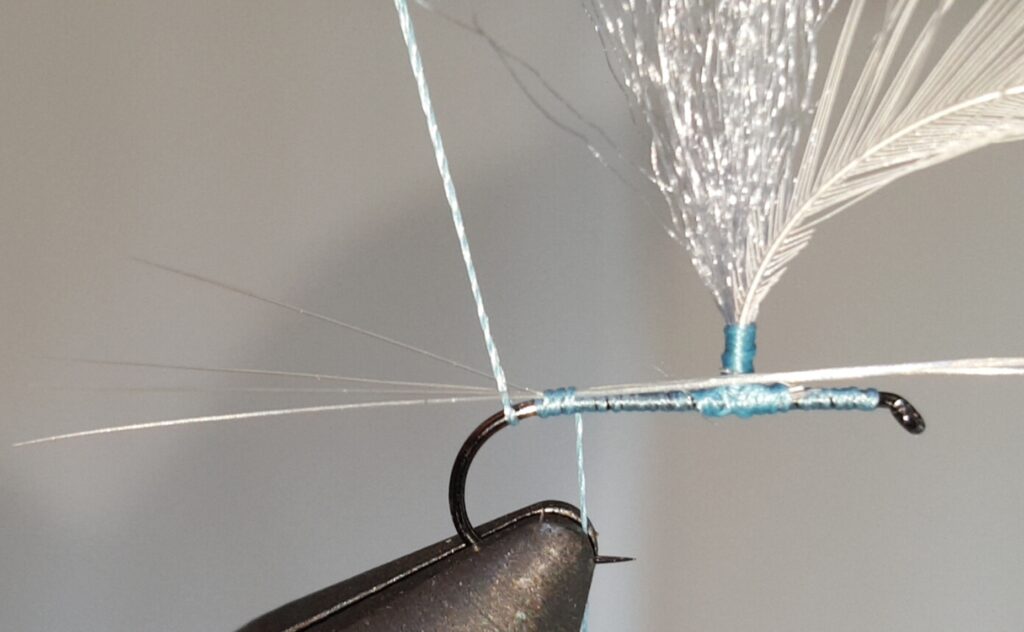
Dub forward, making sure to get a little “fatter” in the middle. An extra bit of dubbing on the last loop behind the post (so you can fill in the space directly under it), then on the first wrap in front of the post (on which the bottom of the pass should angle back a bit to also help fill in the space under the post) will help maintain a smooth profile.
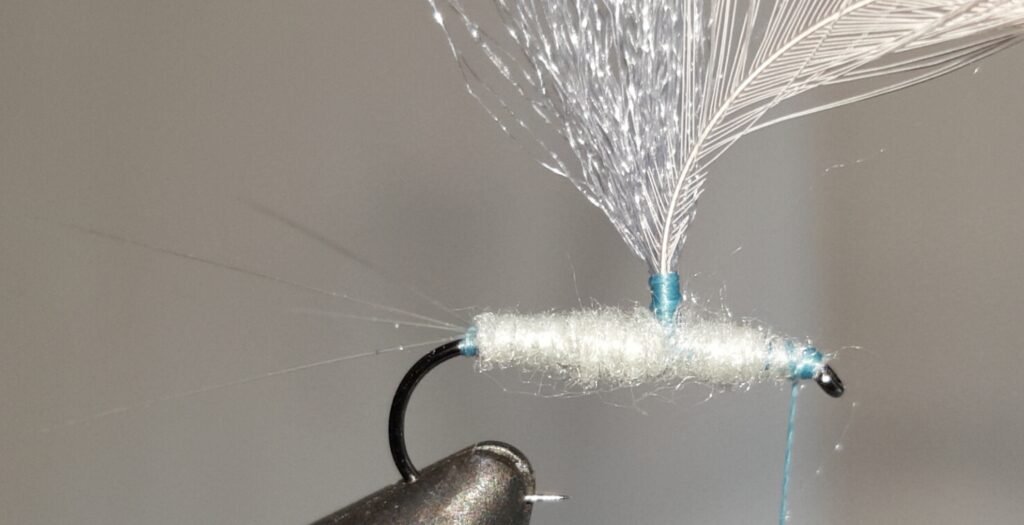
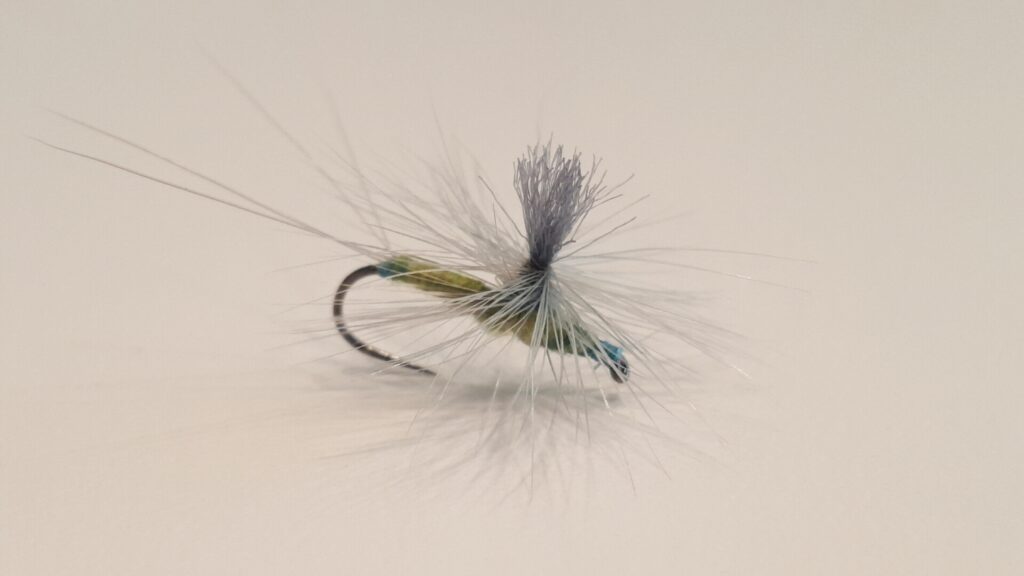
No, I don’t know for sure that the fish care about this. In the future, I may tie a few with an intentional gap, and see how they fish, in case that ends up looking more like the Abdomen/Thorax junction, when seen from below. I would also mention that the light on the camera/phone significantly washed out the dubbing color. It truly is more blue than this…
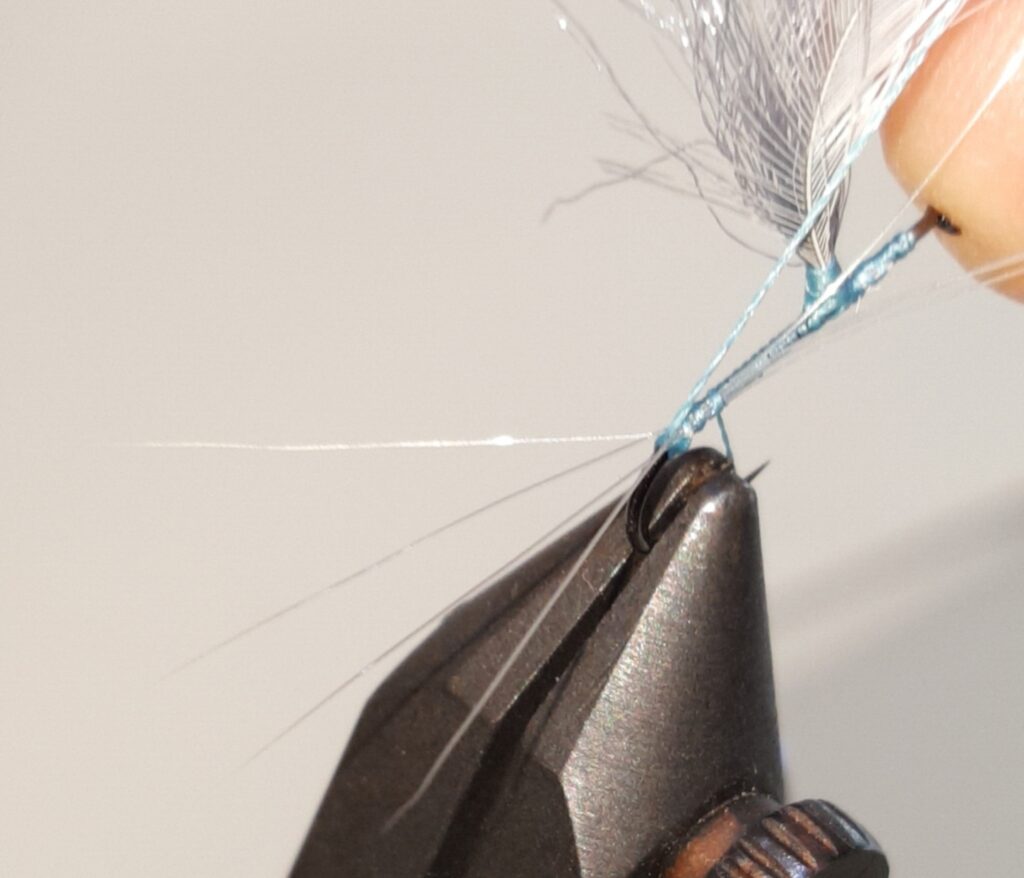
Another personal preference point, here. Intending to finish with a parachute top, some people will leave the thread hanging directly below the post (wrap to the nose with normal dubbing, then a few with very little dubbing to get back to that point). This allows the final wraps and whip finish to be centered around the post.
Others will leave the thread near the nose. When the parachute is wrapped, the final wrap ends with the hackle feather laying against the side, where it is tied down, then whip finished into place. This requires additional effort to keep the hackle fibers from getting caught in the whip finish, which can be tricky.
I did one of each, today, and didn’t think either looked better or worse than the other, but I may have just gotten lucky.
Anyway, wherever you leave your thread hanging, now is the time to hold the post yarn upright, while wrapping the feather around it and working down the post until that feather if flush with the top of the fly. I think I probably did 6 or 7 full rotations with the hackle feather, making the fibers nicely filled in. Anchor and trim the hackle feather wherever you set yourself up to end.
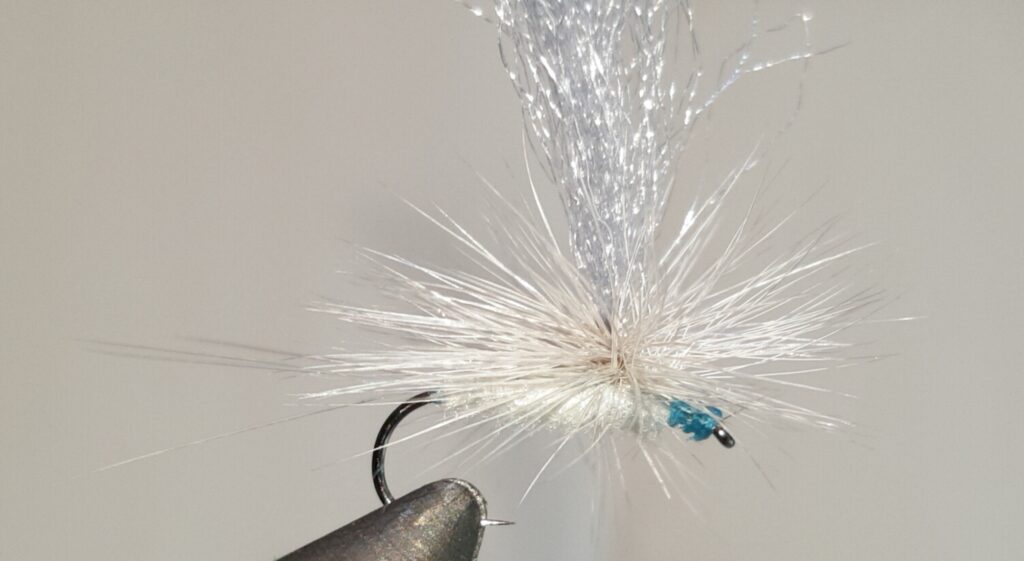
Trim the top of the Antron, so the post is not too tall, then you’re set to go!
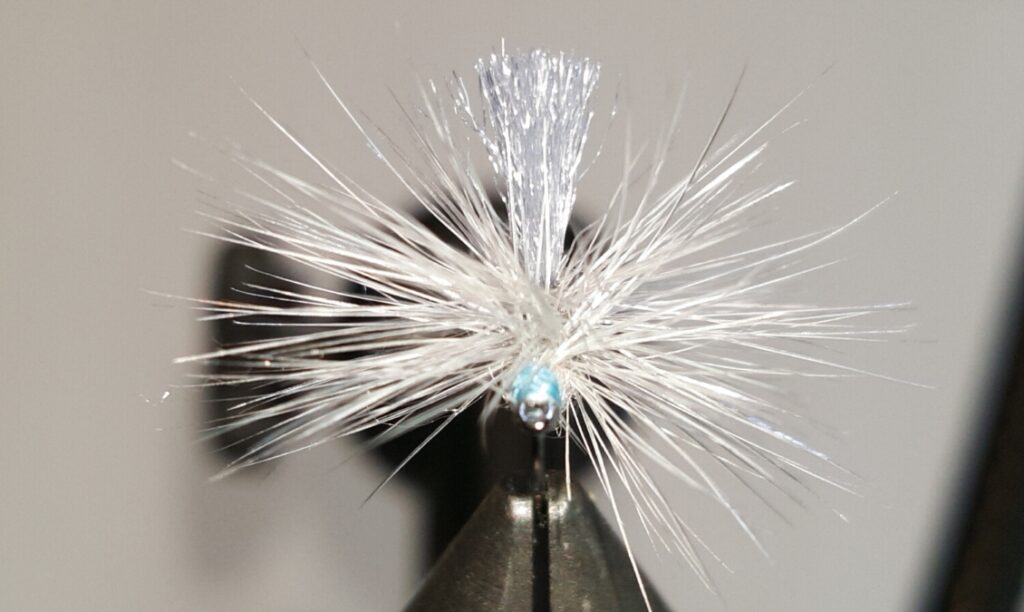
Front view, to check and make sure I have the post lined up with the direction the hook bends. Post and bend/point should be a straight column, viewed like this. I did trim a bit of the lower fibers, on the right, after this.
One more side note. Some tyers also put a drop of head cement on the post, before dubbing even starts, to firm up the yarn and hackle feather. I don’t generally do this, but in case you might want a little more structure, thought I would mention it.
One thing that I will do, though, is a drop of head cement delivered directly into the core of the post, at the very end. I put my cement in a bottle with a needle-like applicator tip, which allows me to push it past the hackle fibers, right up against the post, and watch to see when the immediate area appears to have gotten moist. I feel that this does help the post remain firm and locked in, the hackle feather core locked in place, and the overall durability of parachute ties increased. I use a rotary vise, which permits me to rotate the fly 90-degrees away, so the application point near the shank is more easily accessed.
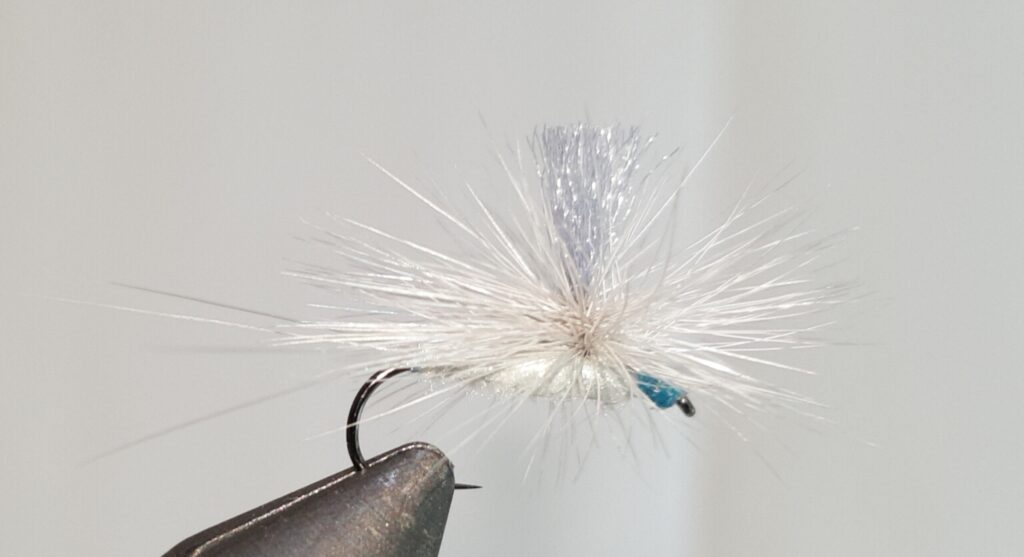
Final product. This was the second one, with a small amount of Olive dubbing mixed in, as well. To me, a simple human, this looks fairly “Mayfly-ish”…maybe…?
I suppose it’s not my opinion that matters on this, though, is it?
Tomorrow, I will hopefully get a chance to test one out.
Until then,
Tight lines…
It looks very nice. Another option on the whip finish is to do one at the hook eye, rotate the hook in the vise, and then reattach your thread on the post. It takes an extra whip finish but I think it’s the easiest way to tie down parachute hackle. Also, 6/0 thread doesn’t seem too large for a #12 hook. I regularly use 140 denies for sizes 12 and larger.
That’s excellent! Had not thought of reattaching on the post, but I will definitely try that, next time. Thank you!
You are most welcome. That’s a tip from the world-class fly tyer Barry Ord Clarke. With the post point out from the vise, wrapping the thread and whip finishing is in the direction we normally do them.