
I get a few fly fishing and outdoor magazines, and thoroughly enjoy reading them. I love the articles on specific fishing locations, the commentaries on various related topics, and even the tutorials on the tying of a given fly, or group of flies. To some, this would be akin to reading about someone else watching paint dry, or a full surround-sound rendition of a set of fingernails dragging down 100′ of chalkboard…in 1/10th speed…at full volume.
I get that.
Like so many other topics that have a microscopically fine, granular level of detail, one has to be part of the relatively small group that is caught up in the topic to see the beauty in those details. Funny thing, though… once you see the beauty in your own little area, you can at least appreciate the “why” of others that derive similar pleasure from topics that might otherwise be totally dissimilar. In fact, when you come across another one of “your people”, perhaps perusing the enthusiast magazine section in larger brink-and-mortar book stores (where you can find them), you both glance at the magazine the other is holding, perhaps wrinkle your brow for a moment (when trying to figure out if the magazine really is about what you thought, at first), then briefly smile as you make eye contact, and move on. Not enough there, perhaps, to trigger a conversation, but you recognize that there must be merit somewhere in the subject, even if it’s not your own world.
Yesterday, I got my latest Fly Tyer magazine (Autumn 2018), and found an article on the tying of the Renegade. I recalled one of my fishing buddies mentioning them, once, and commenting that they were not very common, anymore. I knew I would have to try them, both in my vise and on the rivers, once I saw one.
Today, especially with the forest fires in this corner of the world pushing our air quality into the “Very Unhealthy” stage, was a good day for the first step of this.
Needs:
- Dry fly hooks, standard length and weight, barb crushed, as always. I did both #12 and #14, today.
- Holographic tinsel. I did not have the wide strip version, but what I had on hand worked.
- Two colors of hackle feathers. The article asked for brown and cream, but I prefer barred hackles, so I went with rusty barred and barred white for each.
- Peacock herl.
- Black 8/0 tying thread.
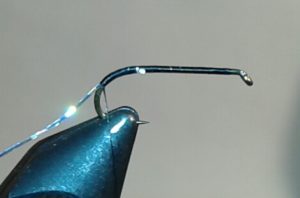
Start with the hook firmly in the vise.
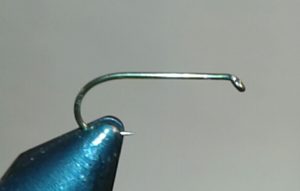
I like to start wrapping thread within an eye’s distance of the back of the eye, then start making tight wraps toward the back, to set a solid foundation layer that other materials can be tied to.
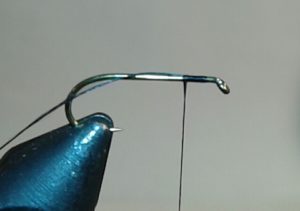
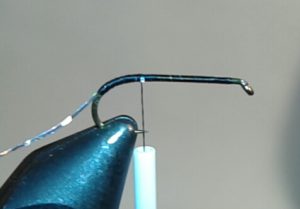
Trim the tag end, then wrap to the top of the bend.
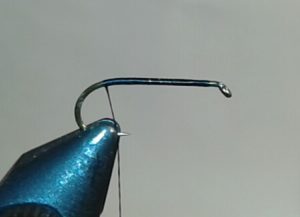
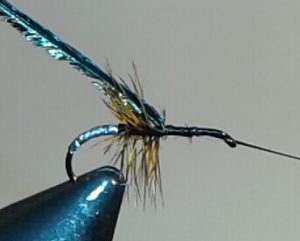
Using the 45-degree technique, tie in the end of your tinsel with 2 or 3 tight wraps.
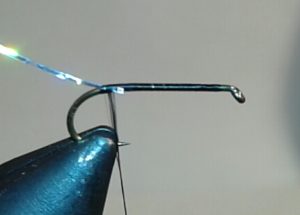
Once the end of the tinsel is locked down, wrap down the upper 1/3 of the hook bend, pinning the tinsel under it, as you go. This will give the “tail” a bit of bulk, especially after the next step.
Once you hit the bottom of the 1/3 you intend to wrap, wrap the thread back up to the original tie-in point of the tinsel.
From here, I throw on a half-hitch to lock my thread down, drape the bobbin over the rest, and use the rotary action on the vise to rotate the hook and slowly wrap the tinsel back up the same part of the hook. The intent is to make an even and consistent layer of holographic tinsel. I got close…which might be enough.
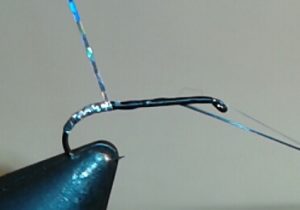
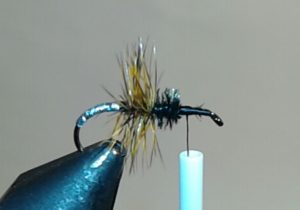
With the tinsel wrapped back up to the tie-in point, give it three tight wraps to lock it down, trim off the rest, then immediately tie in the darker hackle feather at that same point.
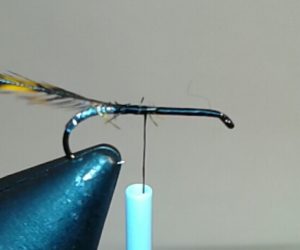
Make sure that you trim the right side of the base of the feather a bit farther back, when you are holding is glossy-side up and taking off the fibers near the tip. This allows the start of the wraps to have no fibers pinned under and offers a bit of a cleaner look…not that you can tell from my tying, today. Wrap the hackles over the back 1/3 of the hook shank. I started a bit forward of the true end of the hook shank, today, so this section went a bit past the first third, but a clean 1/3 is ideal.
A quick transition is made, here. Three tight wraps to pin the hackle, tie in the herl, and prepare for the next 1/3 of the hook shank.
Wrap the herl over the next 1/3 of the shank, then pin with three tight wraps and trim the tag end.
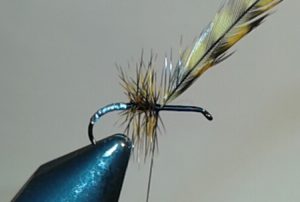
Tie in the lighter colored hackle, here, wrap it forward to just about one eye width behind the eye, then three tight wraps to pin it down.
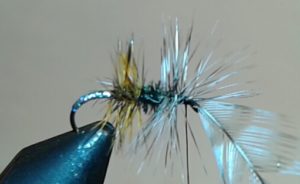
Trim off the stray hackle fibers, add a tight whip finish, a drop of head cement, and you’re done. Very quick fly to tie, once you get used to the order and pattern.
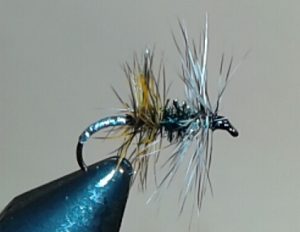
My lighter hackle for the #14 turned out to be mis-labeled #12, but I had no light-colored #14, so I will see if the higher-riding front end makes a difference to the local fish…as soon as breathing outside is again an option. Not one for wearing a face mask while on the water…it might actually scare the fish even more than my rough and splashy wading, water-flogging casts, or occasional exclamations when an overly anxious (and not too wise) young trout actually makes a run at a fly I tied.
Hopefully my fellow anglers will forgive those moments, even if the fish might hold a grudge…
Tight lines.
An old classic. Does well in smaller sizes for midges.
I saw that. I was thinking I would try some #20 or #22, but didn’t have the hackles to match that. Might have to make the drive to the Fly Shop for those, plus a few other items I need, later this week.