Last week I had a bit of free time in the evening, one night, while in Seattle. I took the opportunity to make part of the drive I normally make to head home, just to soak up some scenery.
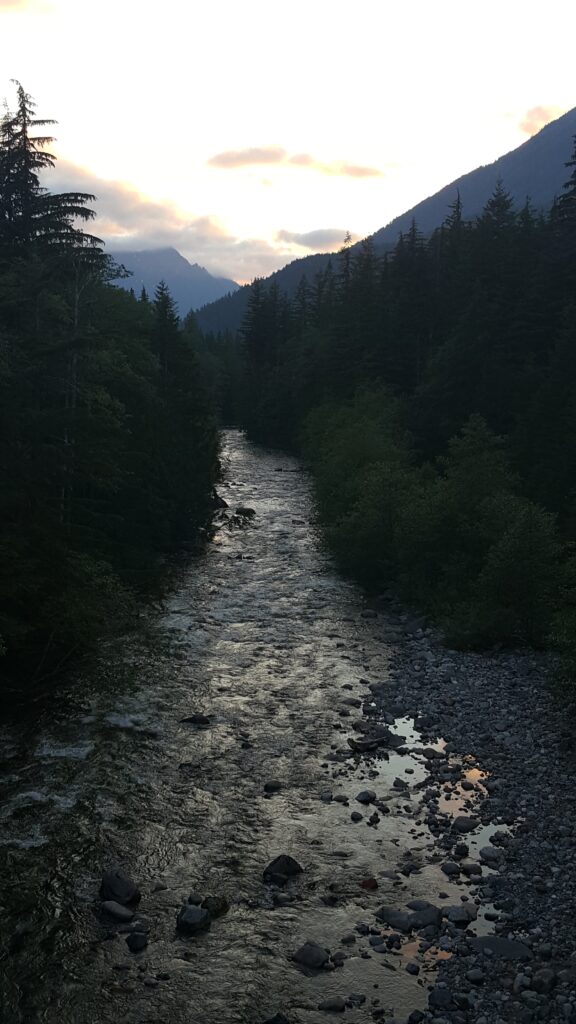
Such a beautiful area. I doubt one could “get used to it,” but I suppose anything is possible.
Stopping by the Picnic spot, on the way home, later in the week, I found the waters at a lovely stage. Snoqualmie South Fork was down to about 325cfs, with temps … well, getting into the almost perfect zone.
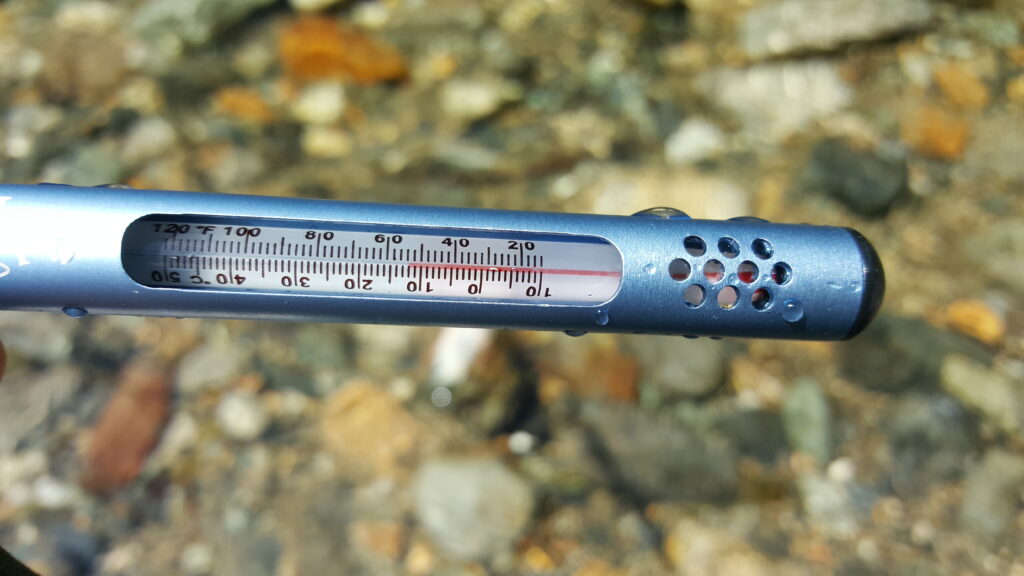
I also discovered that the reduced flow rate had put it below a threshold I had been anticipating for some time.
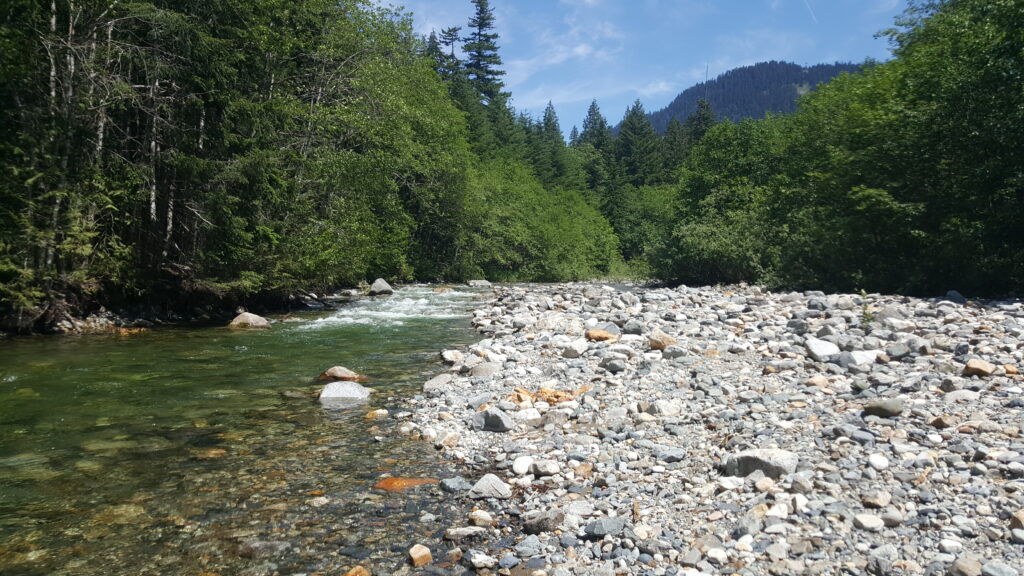
See that tail-out? At this flow rate, it loses a lot of it’s trailing turbulence, allowing a #12 Stimmy to stay afloat (with a few exceptions) from the moment it lands at the bottom of that riffle, until one loses the option to continue mending for a good drift.
As such, it was a successful fishing stop, although nothing was caught in a size that I would want to keep still long enough for a photo.
Go home…grow…come back, later.
The slower flow also put this section back into a very nice level of water clarity.
All that, of course, leads up to this long, holiday weekend. Some time spent, today, to prepare for getting back out to a closer fishing location was definitely in order. Remembering the late evening trip, the weekend before, I wanted to make sure I have some Mayfly Spinner options, just in case I find them falling, again.
- Veevus 10/0 Thread (rusty brown?)
- White Antron Yarn
- Dry hooks in #14, #16, and #20
- Synthetic mayfly tails (Medium Dun)
- Fine dry fly dubbing (I used a couple of different colors, but your local fly colorations should dictate what you use)
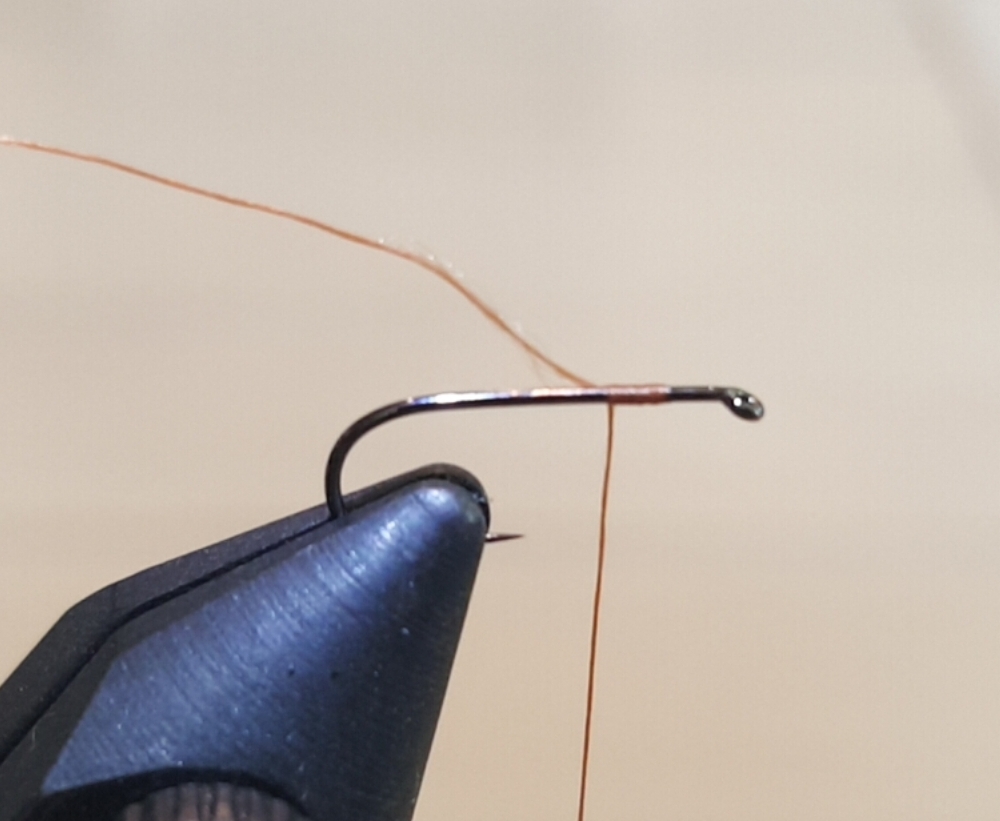
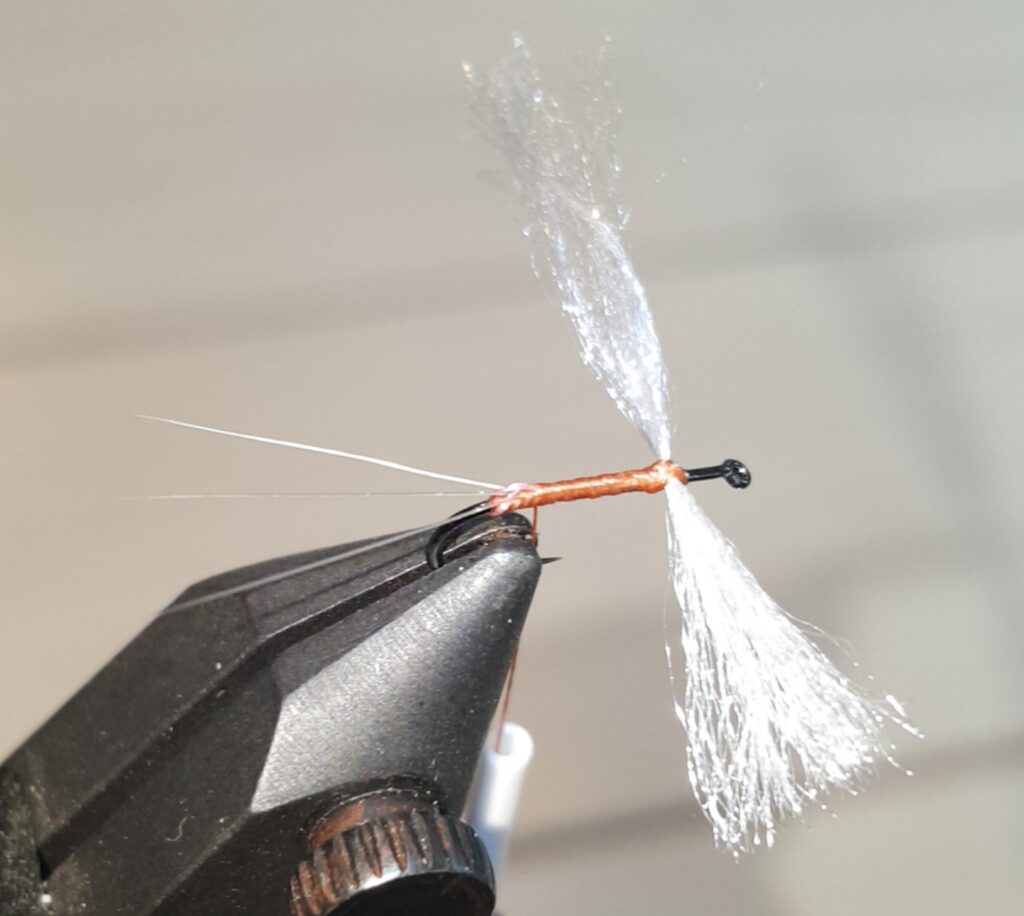
As with the Duns, previously tied, ensure you leave a long tag, when you tie onto the hook, so you can set it aside once trimmed.
Since I wasn’t going to have the massive (relatively speaking) thread concentration of a parachute post, I wrapped to the top of the bend, then added the few extra turns to build up a hump at this spot, as a support for the tails.
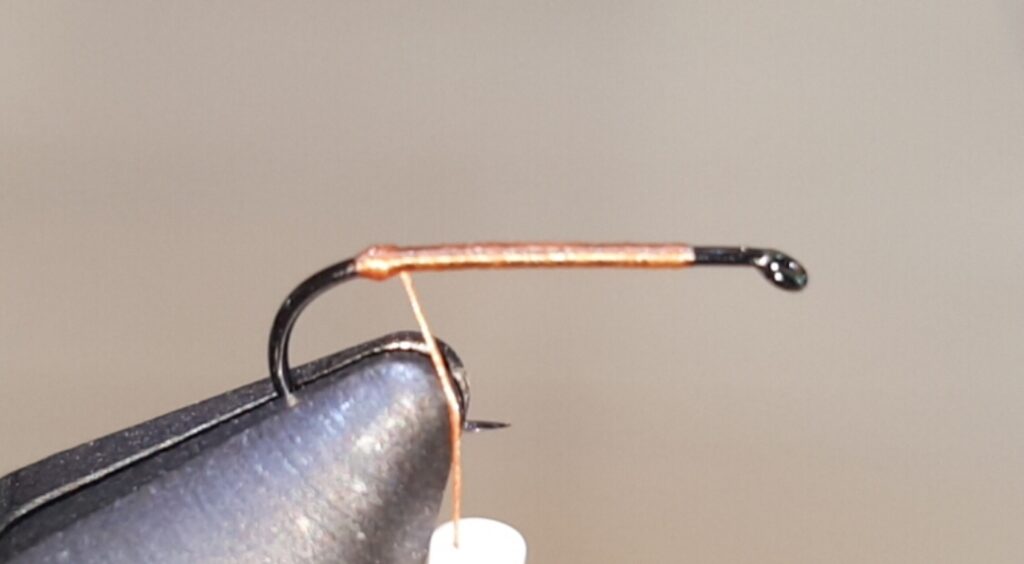
I realized that I had made reference to this on some previous posts, and perhaps had not very clearly shown it, so I zoomed in a bit extra. Apologies for the fuzzy image that resulted.
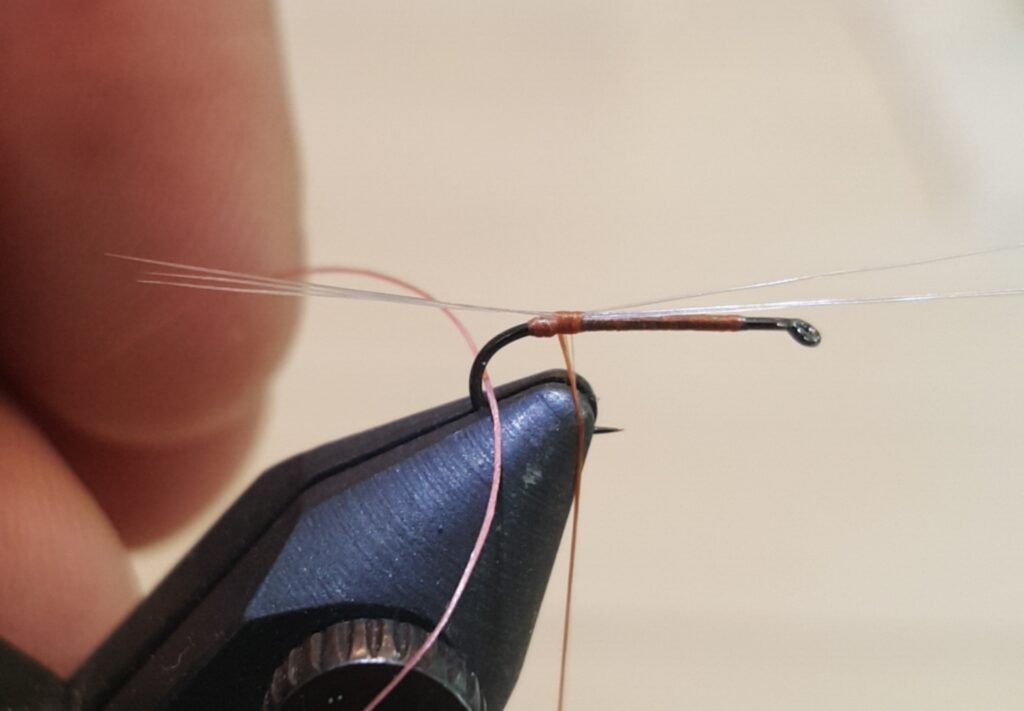
Next, a set of tails (I went with three for this), lined up and slightly longer than the hook length.
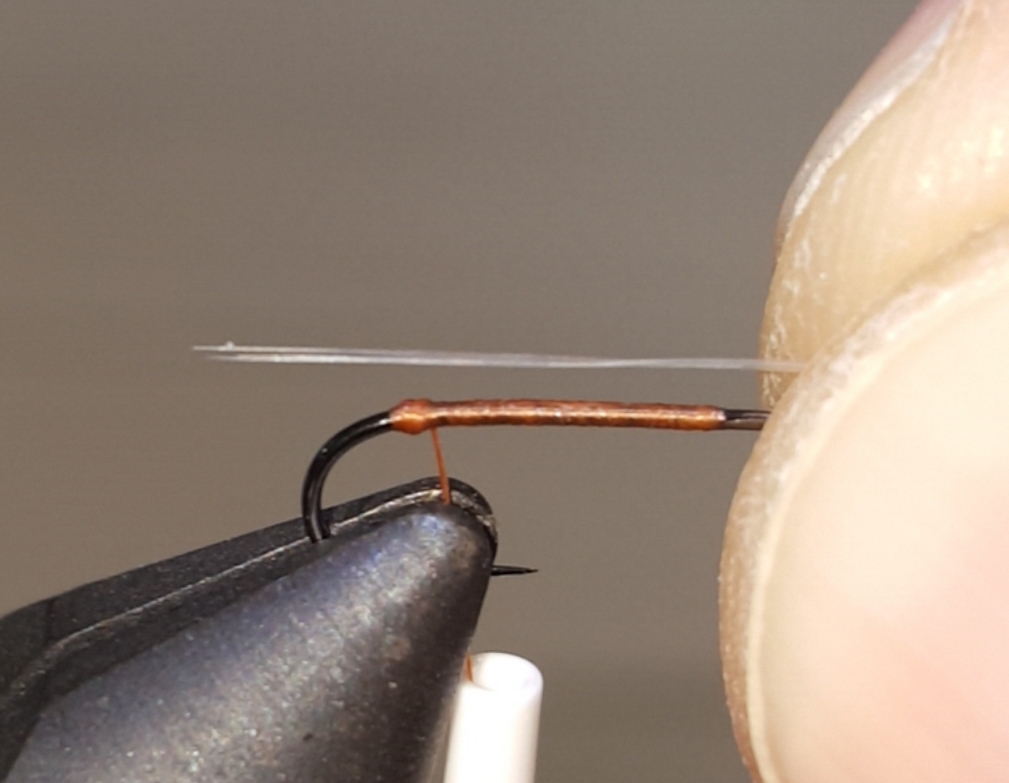
Start them at an angle, with the wraps one or two turns away from that thread bump. This will let you anchor them onto the shank, then draw them into alignment with the centerline of the hook as you approach the final wrap, which should be immediately forward of the thread bump. In essence, you want to bind the tail fibers against the shank while forcing them to angle up to clear the thread bump.
At this point, as with the Mayfly Dun dry fly, take the trimmed tag portion of the thread and feed it through the opening between the hook bend and your hanging bobbin thread.
Take the near end of the thread, and bring it up between the closest of the tail fibers and whichever one seems to want to be the middle tail. Don’t tighten or pull hard, as the fibers will just tend to bend away and slip past, but bring it loosely forward and tuck the end between the butt ends of those tail fibers and the hook shank, to keep it from falling back out of position, while you work on the other end of the tag thread.
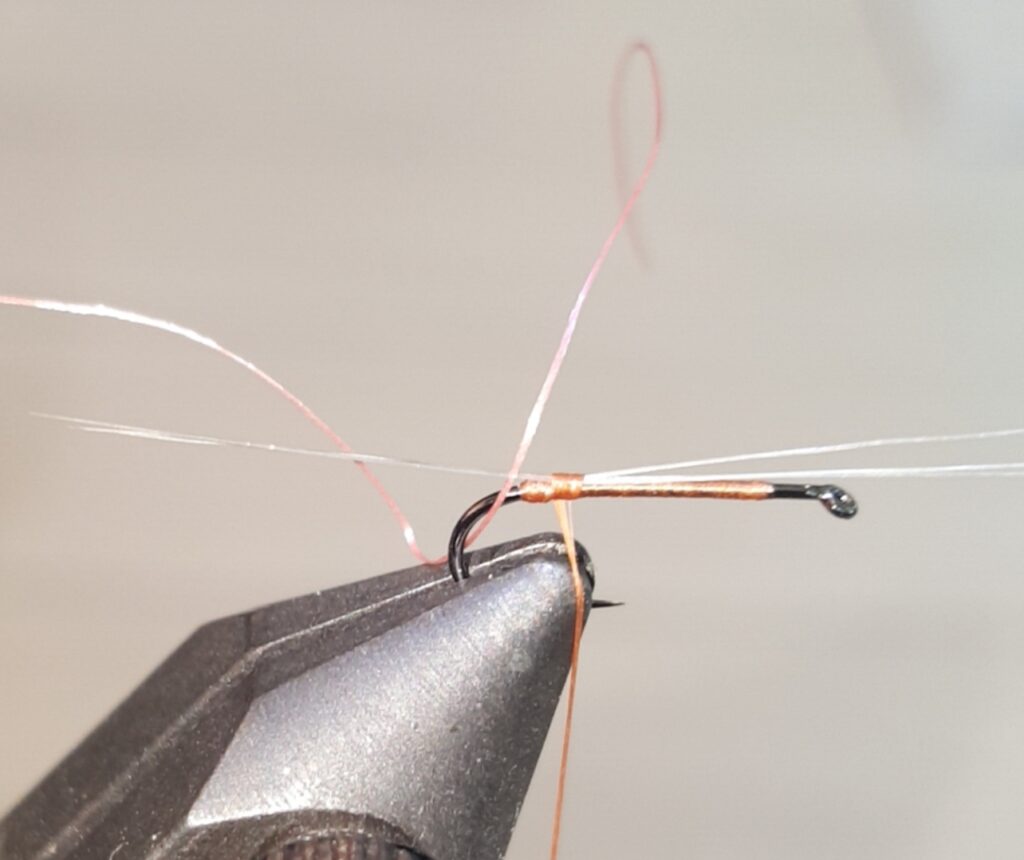
Now, take the other end, and do the same between the middle and farther tail fibers. Once completed, you should have the tag thread piece looped around the bend of the hook, with tip ends coming up through both gaps between tail fibers.
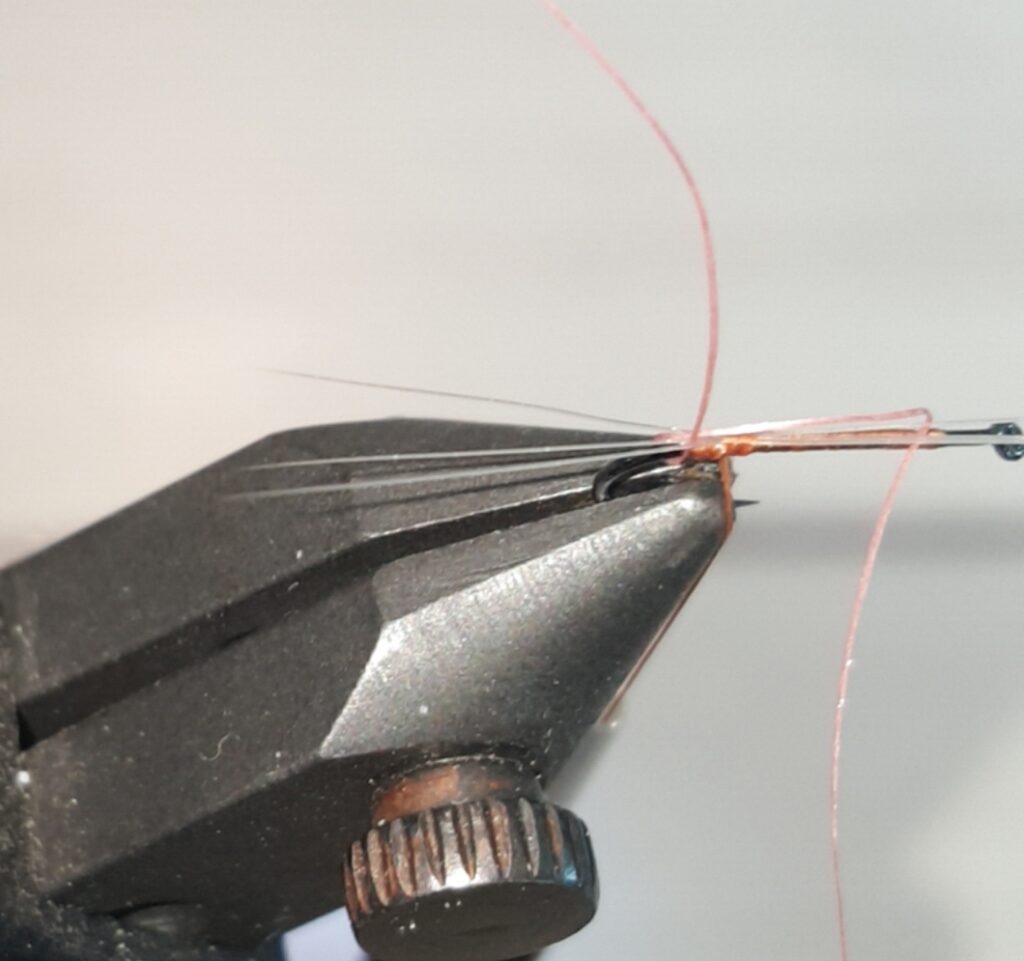
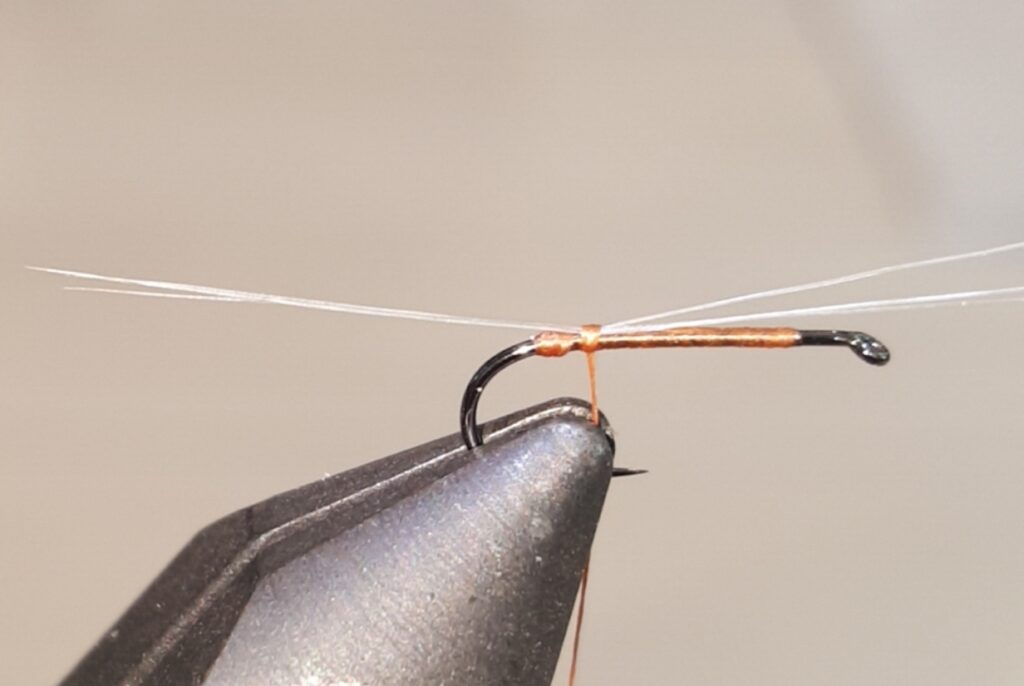
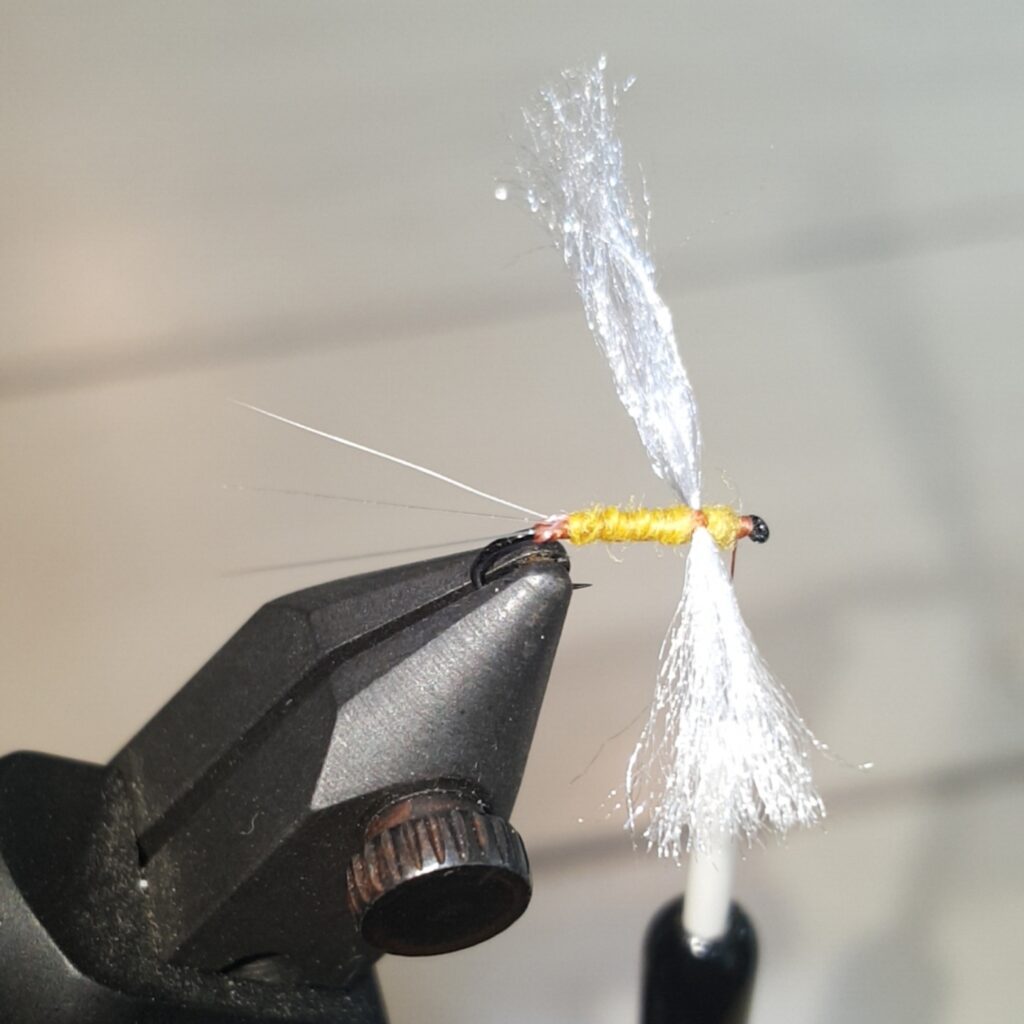
Now, with very little tension, draw that thread loop up against the bend, and forward along the hook shank. Again, not too much force, but you will see the right amount when the two outside tail fibers splay out at roughly 45-degree angles.
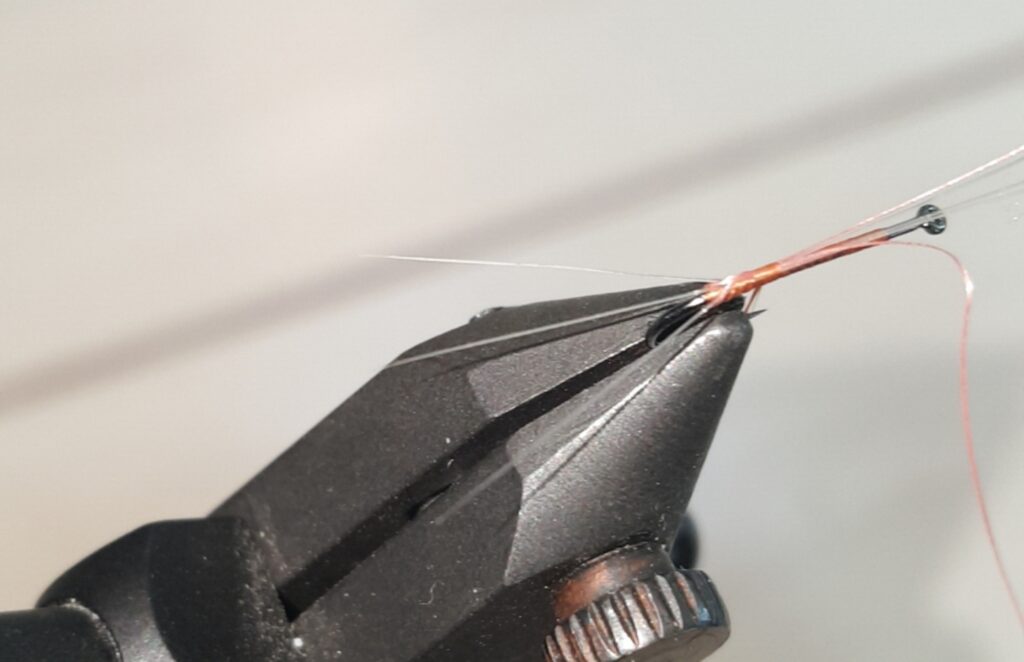
Lay the tag thread against the shank, then wrap your tying thread around it and the butt ends of the tail fibers, to anchor all of them down, tightly. If, after the first or second wrap, you feel the tails have slipped back towards the centerline, you can give the tag tips a small pull to increase that tension, but if you are wrapping your thread tightly, you will lose that option at/after about the third wrap. Make a point of stopping before then, to recheck tail angles. When the tag thread and tails have been properly secured, trim them off and wrap your tying thread forward to about the 2/5 mark from the eye. Once you get there, cut a section of the yarn and tie it onto the shank with a firm wrap. Follow this with some figure-eight wraps, to draw the yarn into projections to either side of the hook shank, level with the shank itself (as seen looking down the length of the hook from the eye).

A small set of wraps to lock this in place, then return to just in front of the tail fiber thread bump. Don’t wrap over it, or you risk pushing the tail fibers downward.
At this point, tightly dub the thread, in preparation for wrapping that forward. It should be quite sparse, as the spinner bodies seem to be narrow, as they float in the film, atop the water. The tight dubbing and touching wraps should provide something of a banded, segmented impression. When you get to behind the eye, a small head of just thread, followed by a whip finish.
Next, gather the “wings” together, draw them back (making sure to line up over the centerline of the fly, so the following cut is even from side to side).
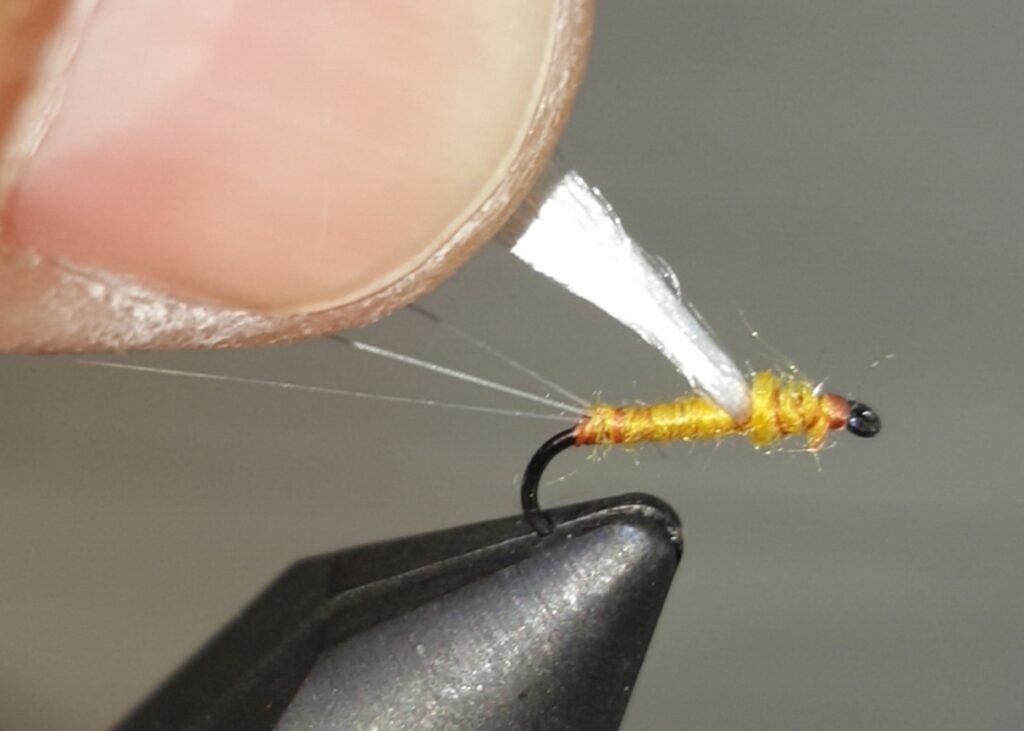
I went back a bit beyond the bend, thinking that the cut fibers would kink up a bit, and shorten in the process.

We shall see. That was a #14, but I think I like how this #20 ended up, a bit better.
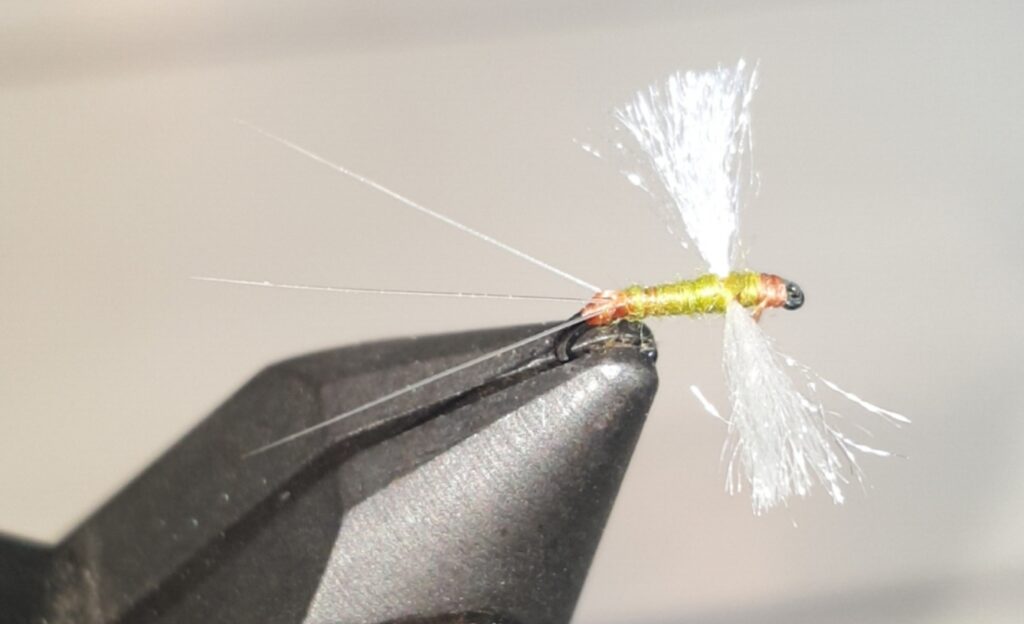
I suppose we shall have to leave it up to the local trout to tell me if these are passable, won’t we. I may change to color-matching the dubbing and thread, in the future, but who knows, maybe the fish will suggest I don’t need to.
Wishing everyone a safe and happy holiday weekend.
Tight lines…